First step – General
In this step you define FB page activation and
deactivation date. This step also contains general FB page information
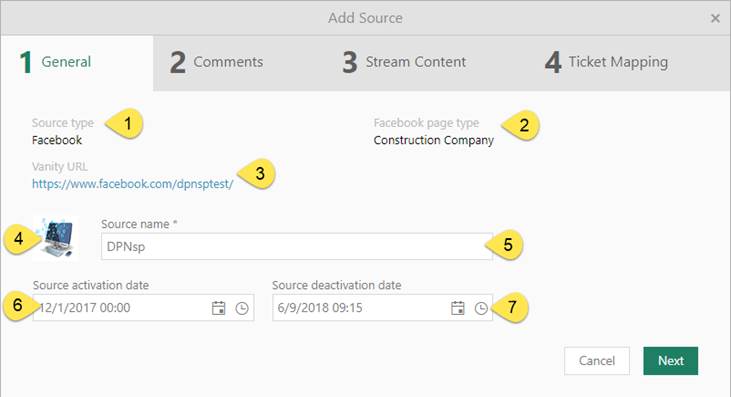
Add source - General
1. Source type – Can only be Facebook at the moment.
2. Facebook page type –This field is auto generated by FB
page.
3. Vanity URL –Vanity URLs are a type of custom URL that
exists to help users remember and find a specific page of your website. This
field is retrieved from FB page.
4. Image –The profile image used by the FB page.
5. Source name – On the creation of the Source name synonym
with the FB page name. However this field can me modified to a name that lets
you easier keep track of your sources.
6. Source activation date – Note that the synchronization against the Facebook
needs a start date that is added here. You can either set the
current date and time to start immediately or at a later date.
7. Source deactivation date: Leave this field empty if you
want your SMM source to be monitored continuously. If you just want it
synchronized during a limited period set an end date here.
The Source activation/deactivation
dates are mirrored in the Source main table Active
column
Use Cancel button if you want to cancel adding
new source or use Next button to
proceed to the next step.
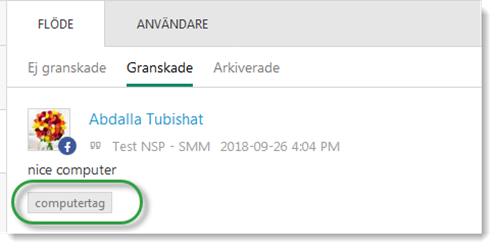
Second step – Comments
In this step you define how FB comments on post or
review will be transformed in to Ticket comments in NSP.
• Default comment author – If the comment writer uses a FB
account that is not mapped to a NSP account the User here will be used. It can
be an Agent or a “dummy- account” created specially for this purpose.
In the
latter case, be aware of that any notification for created Tickets will be sent
to the mail address of this account. With what that can mean for mail server
activity and mail account handling.
• Comment visibility: Choose whether the comment will be Public or Internal.
•
Comment type: Set
whether a comment will be created as Default,
Solution or Workaround.
We recommend to use the Default
setting.
Use Cancel button if you want to cancel adding
new source, Back to go to pervious step or
use Next button to proceed to the next
step.
Third step - Handle Content
Here you setup which FB page content will be streamed, status
of streamed content, automatic ticket creation and so on….
In the settings
you find references to “page handlers”. These are Account owner and Facebook
users with Administrator or Moderator roles on the page in the Source.
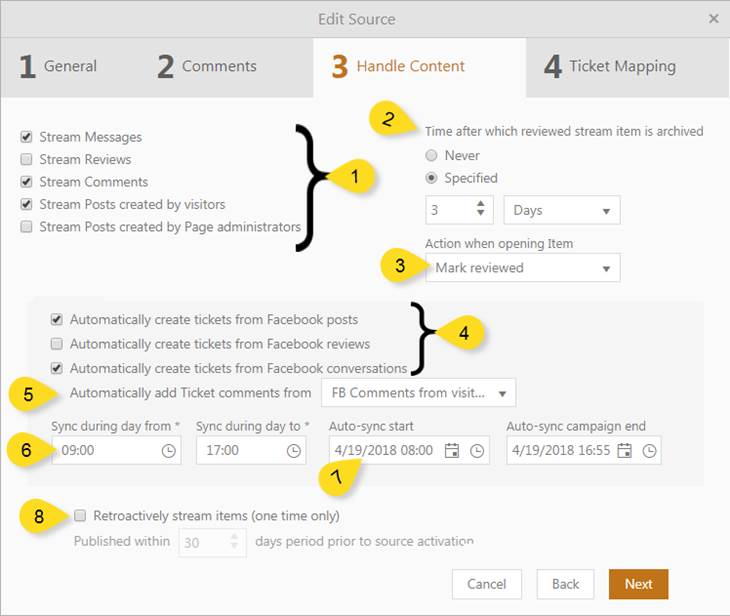
Add source- Handle content
1.
Stream Messages, Stream Reviews, Stream Comments, Stream
Posts created by visitors, Stream Posts created by page handlers: For
each of these option chosen, an item will be created that is shown in the tab
Stream - For Review
in the Social media manager in Agent Portal.
If any of the
“Automatic create tickets from…” options also is set (4.), both Ticket and
Stream item in Agent portal Social media management will be created. The latter
will directly have been set as Reviewed.
2.
Time after which reviewed stream item is
archived. You can define a time after which streamed items
automatically are moved from the Stream- For Review list to Stream- Archived.
3.
Action on Post open. You can choose to manually
mark SMM-items as Reviewed (dropdown list choice None)
or that it is done automatically when Mark reviewed is chosen.
If Archive is chosen the Item will be moved
directly to the Archived list without a pit stop in the Review list.
4.
Automatically create tickets from Facebook posts, …
reviews,
… conversations: These settings are called Auto-sync in the system. Select any of these options if
you want to automatically create NSP ticket from FB Items.
If any of the
“Stream…” options also is set (1.), both Ticket and Stream item in Agent portal
Social media management will be created. The latter will directly have been set
as Reviewed.
5. Automatically
add Ticket comments from: Using the setting here you decide if Comments made
on FB posts are to be included in the Tickets that are created from these posts.
You can choose between: None, All FB comments, FB comments from visitor, FB comments from Page handlers.
If you have been using the
SMM Source a while when marking this option only the items in the
Agent portal Social media management lists For Review and Reviewed
will be affected. Not the ones in the Archived
list.
6. Sync
during the day from, ….To: Facebook has an absolute number of times per day an
application is allowed to retrieve information. In order to optimize
synchronization frequency it is favorable if you limit the time in which the
synchronization is done during the day. Items added outside this time restraint
will be retrieved the first sync of the day.
Tip: Sync only during office hours.
7.
Auto-sync start and Auto-sync campaign end date – You always have to set a
start date if you want to use the Auto-create-ticket-function. But only set an
end date if you want it to be a limited campaign.
8.
Retroactively stream items (one time only): If you
have a FB-account that you have been using before linking it to NSP as a Social
media Source you perhaps want to retrieve FB items that already have been sent
to the page. This option lets you do this as a one-time option.
Set how many
days prior to the Source Activation date (Step 1) you want to include. The items
are created as object accordingly to the Stream and Auto-sync settings.
Fifth step – Ticket Mapping
This step is available only if some of actions from
automatically ticket creation is selected.
Selecting the Ticket
data template that will be used when automatically ticket creating from
social network items. Mark the row that contains the mapping you want to use.
This will be marked with a green marking and shown as Selected mapping.
You can view the template by clicking row menu item View. If you want to create new template, you have to
exit the Add Source dialog (save!) and go to Configuration> Social Media
Management> Ticket Data Mapping> Add template.
Verify choice by clicking Save.