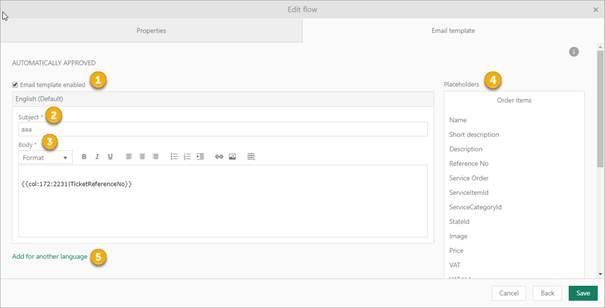
First step – Properties
 Approval
flow properties
Approval
flow properties
1. Name: Approval flow name. Mandatory field.
2. Entity Type: Choose Entity Type from dropdown list. (in current version only Service Order Item is selectable). Mandatory field.
3. Description: Use text to make it easy for you to find the approval flow you are looking for in the approval flow list.
4. Active: Enable this checkbox if approval flow shall be active.
5. Approval flow: Choose one of the approval flows types:
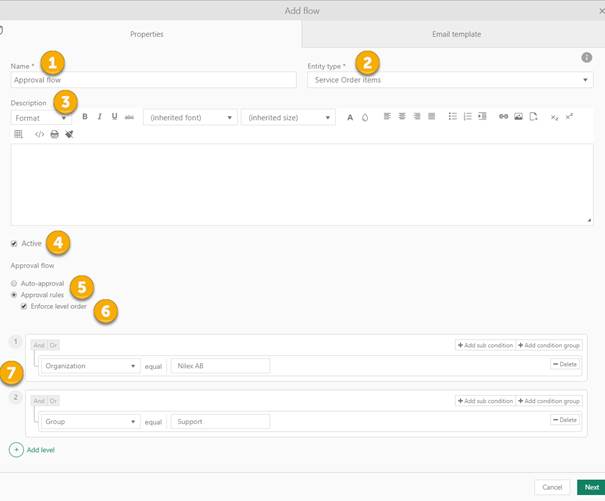
•Auto-approval means that order is automatically approved. If you choose this one no more definitions is needed, just click Next to go on to second step to configure Email templates.
•Approval rules means that order should be approved by person/group you defined in Condition Builder (7).
6. Enforce approver order: This option is visible only if Approval rules is selected. Enabling this option to defined that order must be approved in same order as you define in Condition Builder. If not enabled the users defined in Condition Builder can approve in any order, independent of each other.
7. Condition Builder: This option is visible only if Approval rules is selected. Here you defined who will be in charge to approve/reject order. In the condition builder you can select specific User, Group, Organization or Requester Reference. Requester Reference can be chosen among all available person reference field defined for Requester, e g AD Manager.
The condition is built of a logical hierarchical structure of Conditions and Sub conditions. The different conditions are linked by operators And (AND operator) and Or (OR operator). You can select And to require match of all the linked conditions, or Or if match any single condition from the linked conditions defined is enough. The order is approved only if the result of the complete logic expression is true.
The section is initially displayed with one empty condition row, Add condition and Add sub condition buttons, Delete button and operator selection And/Or.