 ) in Entity
Editor, the Form Template List for the
selected entity will be displayed:
) in Entity
Editor, the Form Template List for the
selected entity will be displayed: Using Form Editor you can create and manage entity forms, e g forms containing properties for different ticket types. Entity forms are displayed under Add + button in Dashboard screen and when End User Submit a Ticket. Each entity form is unique and has different fields.
You can create, edit, clone, activate or deactivate, change ticket type, and delete entity forms and you can also define the scope of a form and make the form as a default. The form is only displayed to the users covered under the defined scope.
This option is available for each entity in the list.
When you click on Edit Entity Form button () in Entity
Editor, the Form Template List for the
selected entity will be displayed:
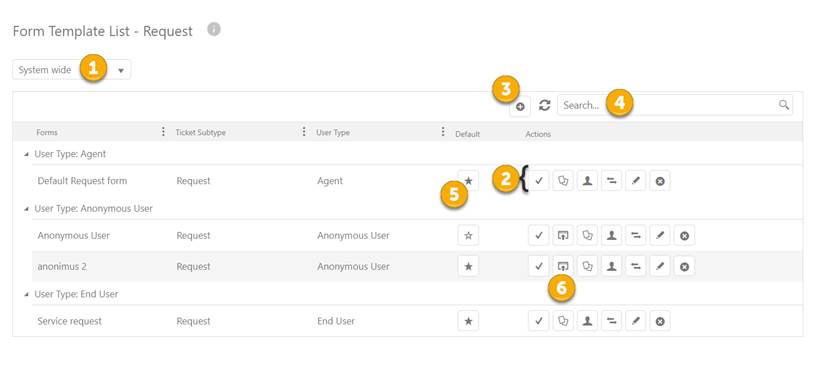
Form Template List
This form lists already added entity form templates, active forms followed by inactive ones. At the top of the form, there is dropdown (1) available to filter the list of the forms based on its scope. Scopes are: User, Group, Organization and System wide.
Each item in this list has Actions buttons (2, 5) associated with it:
 Activate: Used to activate or deactivate the form
template.
Activate: Used to activate or deactivate the form
template.
 Clone: Used to clone the selected form template to
create a new.
Clone: Used to clone the selected form template to
create a new.
 Permissions: Used to set or edit the permissions of the
form.
Permissions: Used to set or edit the permissions of the
form.
 Change Ticket Type: Used to change the Ticket Type of a form. This option is only available for
the entities which base type is Base Request. When
you click this action, Ticket Type field is replaced with a dropdown list
containing various active ticket types defined for the entity.
Change Ticket Type: Used to change the Ticket Type of a form. This option is only available for
the entities which base type is Base Request. When
you click this action, Ticket Type field is replaced with a dropdown list
containing various active ticket types defined for the entity.
 Edit: Used to edit the entity form template. Edit opens Form Template
Builder, the same form as when you add a new form template.
Edit: Used to edit the entity form template. Edit opens Form Template
Builder, the same form as when you add a new form template.
 Delete: Used to delete entity form template.
 Default: Used to set the form template as default
entity form. Only one template can be set as default for each User Type (Scope).
Default form will be opened when user clicks the Add
+ button in dashboard (Agents) or Submit a request menu in Self
Service Portal (End Users). If forms are
created in different scopes (1), there will exist
default forms under each scope. The default form will then be selected
from scopes in following order: 1. System wide, 2.
Organization, 3. Group, 4. User.
Default: Used to set the form template as default
entity form. Only one template can be set as default for each User Type (Scope).
Default form will be opened when user clicks the Add
+ button in dashboard (Agents) or Submit a request menu in Self
Service Portal (End Users). If forms are
created in different scopes (1), there will exist
default forms under each scope. The default form will then be selected
from scopes in following order: 1. System wide, 2.
Organization, 3. Group, 4. User.
Anonymous forms have additional action (6) Public forms  . This action is used if you want to create
embed anonymous ticket form. Click on the action opens following form:
. This action is used if you want to create
embed anonymous ticket form. Click on the action opens following form:
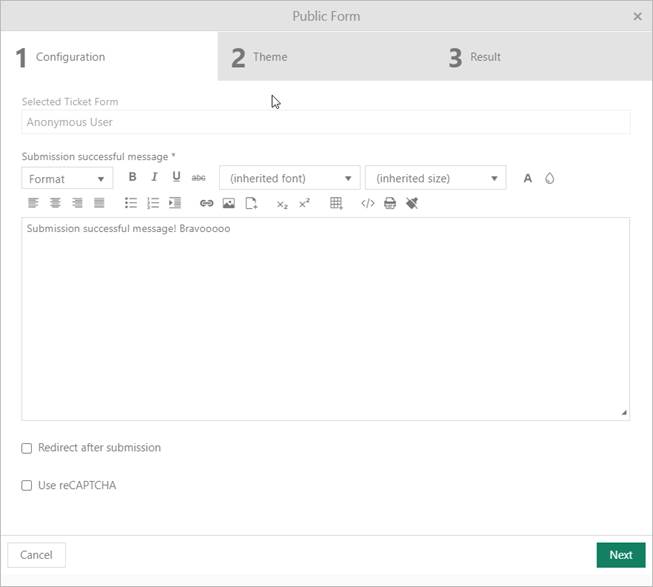
Create form first step
In first step you should define following details:
•Selected Ticket Form – This field is read only and displayed previously chosen ticket anonymous form
•Submission successful message – define message which should be appear after user submit form
•Redirect after submission – if you select this checkbox you will be able to insert redirect URL after form submission.
•Use reCAPTCHA – if you select this checkbox you activate reCAPTCHA security on your form
Use NEXT button or click on THEME to proceed the next tab. Use CANCEL if you want to cancel creating public form.
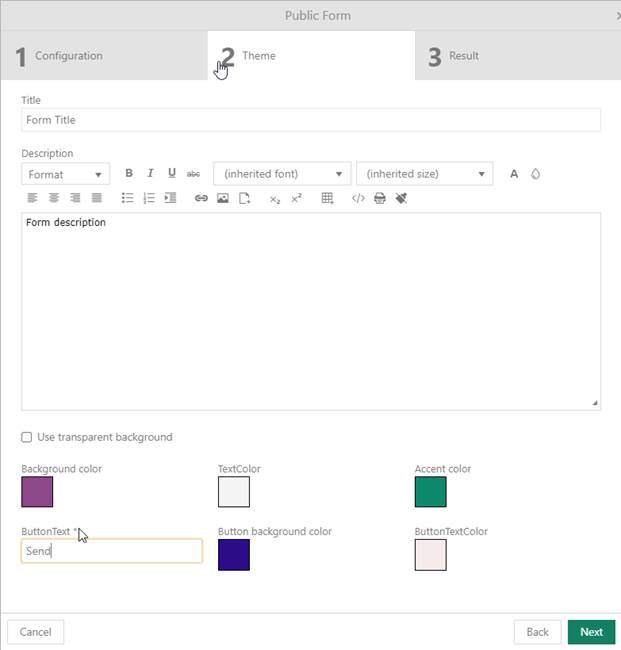
Create form second step
In the second step you need to customize ticket form:
•Title – define form title
•Description – define form description
•Use transparent background – select this checkbox if you want to use transparent background in other case define form color parameters: Background color, Text Color, Accent color, Button text, Button background color and Button text color.
Use NEXT button or click on RESULTS to proceed the next tab. Use BACK button to go back on pervious step, or use CANCEL if you want to cancel creating public form.
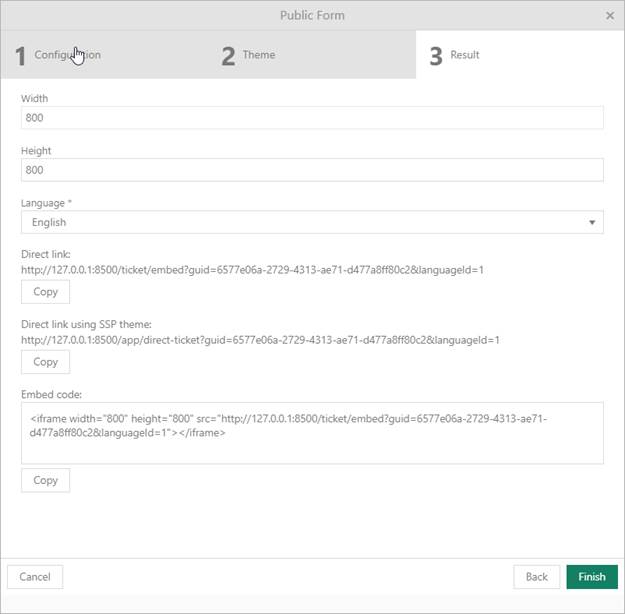
Create a form third step
At the final, third step, you need to define Width, Height and Language for ticket public form.
Now you can choose how to share created form, three possibilities are available:
•Direct link (To share a direct link, click Copy here)
•Direct link using SSP theme (To share a direct link within Self Service portal layout, click Copy here)
•Embed code (To embed the form on your website, click Copy to copy the code.)
Search (4) functionality is useful when you have to deal with the large amount of data. As soon as you type in the search box, the data in the list will be updated based on entered keyword.
To add a new entity Form Template, click Add new record button just beside the search box (3). This action will open the Form Template Builder.
Note: The form builder functionality is license controlled, meaning that there could be a limitation in the number of forms the system can hold. If it is not possible to add forms this could be the reason and you need to upgrade NSP to other product version, see Nilex Products.