Here you can create, initiate, update and install an NNS database, as well as start and stop NNS service. You can always start Service Settings Management Utility from the Start menu.
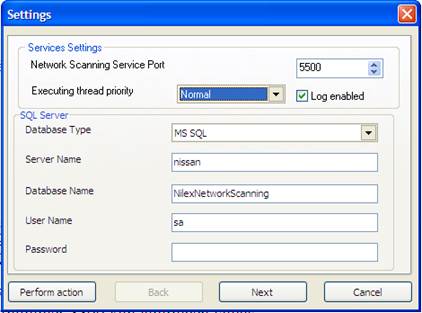
•Network Scanning Service Port – the port for communication with this service. Same port is specified when installing agents and in administration console, due to these need to know on which port to communicate with the service
•Executing thread priority – a priority for the service thread. Start using setting Normal and lower the priority if you experience any problem with high usage of the CPU time by the NNS service.
•Log enabled – Log file NilexNetworkScanningServiceApp.exe.log is saved in folder ”C:\Documents and Settings\All Users\Application Data\Nilex Network Scanning\Network Map Server”.
•Database type – MS SQL or Oracle
•Server Name – MS SQL database server (computer name or IP address). If using a different port on SQL server then default 1433, then also port number must be stated here, separated by comma: name, port-number or ip-adress, port-number.
•Database Name – The name of the SQL database or Oracle schema
•Username - account for the database. Use an account with at least rights to create tables and stored procedures (DB_owner for the MS SQL or schema owner for the Oracle)
•Password
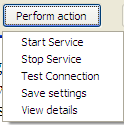
Button Perform Action
|
|
•Start Service – start the service (prerequisite is that database is created and initialized) •Stop Service •Test Connection – testing a connection to the database •Save Settings •View details – shows further information about the database |
Creating a new database is easy. You just need to choose a name (preferably NilexNetworkScanning) and use an SQL account with at least rights to create a database. If you already have created the database in MS SQL Server Manager then write the name and use an account with at least rights to create tables and stored procedures. Click on Next.
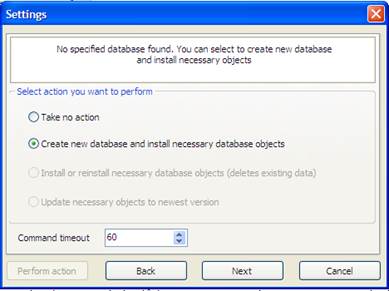
The program will recognize if the database already exist. If there is no database with that name the program will suggest to create one:
But if an empty of installed database with that name already exist on the SQL/Oracle server then the program will suggest to install or reinstall (Install or reinstall necessary database objects)
Finally, if database already exist but is of older version, an update is suggested (Update necessary objects to newest version).
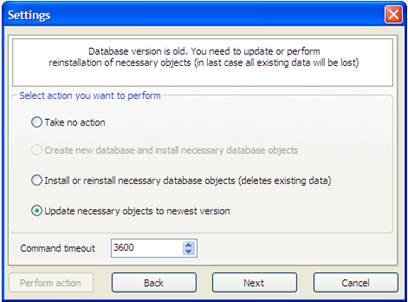
Command timeout – is time the installation program will wait in case database server doesn’t respond during installation- of update procedure.
Click on Next to continue the installation/update procedure. You will get a warning that all data will be lost. After confirmation the database is installed relatively quickly. At the end you will receive a confirmation and a question to start NNS service.
Click on Yes and then Finish. NNS service is now installed and you can always open the configuration dialog through Start menu option Program > Nilex Network Scanning> Server Settings Management Utility.