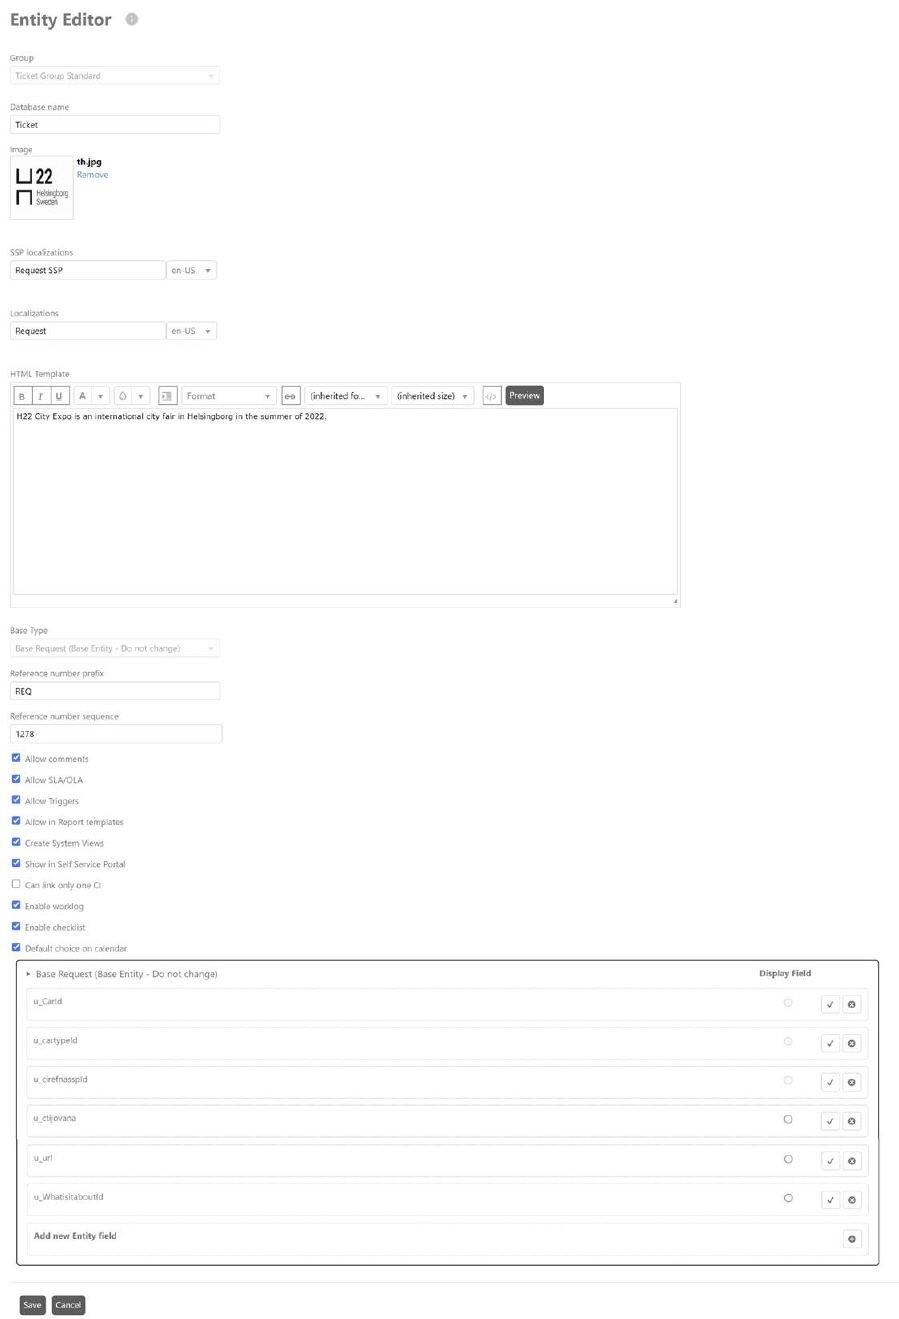
NSP administrators can add new entity using Add new record button in Entity Editor. When you click this button, Entity Editor form is displayed:
Add New Entity
Description of the fields in the form:
•Group: Select an entity group from the dropdown list. This field specifies the group to which the new entity will belong after creation. The groups displayed in this dropdown list can be added in the Entity Groups module. It includes activated groups.
•Strong Name: This is the unique name to identify the Entity internally in NSP.
•Image: An icon representing that type of ticket. This icon will also be displayed on the Self Service Portal.
•SSP localizations: Localized name on Self Service Portal for the entity. You can select language from the dropdown list first and then add name for that language. You can define the name for as many languages as you want.
•Localizations: Localized names on Agent Portal for the entity. You can select language from the dropdown list first and then add name for that language. You can define the name for as many languages as you want.
•HTML template: The value of this field is a description of that ticket type which will be displayed on the Self Service Portal.
•Base Type: This option is used when you want to create a new entity which inherits few or all properties of a previously added entity. You can select the entity you want as a base, from the dropdown list.
The Entity you are creating is in essence a copy of this base type and it will hold all the same properties as the this. You then add additional properties and, if you want, change the behavior of your Entity by changing the settings.
To create
Ticket entity choose base type Base Request (Base Entity
– Do not change).
If you want to create a basic entity that do not
inherit any properties from a parent, select base type BaseEntity.
•Reference Number Prefix: This field is only displayed for the entities which base type is Base Request or for the entities which base type entity has Base Request as its base type. You should enter the prefix value by which the reference number of an entity starts. For example, “PRB” as shown in the above figure. Hence, whenever a Problem is created, its reference number will start with “PRB” (e.g. - PRB0000001). Note that limit for defining prefix is 3 characters.
•Reference Number Sequence: Similar to Reference Number Prefix, this field is only displayed for the entities which base type is Base Request or for the entities which base type entity has Base Request as its base type. You define the number by which the sequence for the entity’s reference number starts. For example, if “101” is defined here and value for prefix is “INC” for Incident then first incident in the system will have a reference number “INC0000101”. Next incident created after that will have reference numbers “INC0000102”, and so on. Reference Number contains 7 digits except prefix.
•Allow Comments: Enabling this option shows comments on the entity detail screen. This means that if comments are allowed then NSP users can see the comments on the entity detail screen and they can post the comment also from the same screen.
Note that this setting only affect the Form Editor, where the possibility to add comment control to the form is disabled. Already existing forms will not be changed. If you disable Allow comments for an existing entity you have to remove the comment control fields from all existing forms manually.
•Allow SLA/OLA: Enabling this option means defining whether SLA/OLA is applicable to the entity or not.
•Allow Trigger: Enabling this option means defining whether Triggers can be used with this type of entity or not.
•Include in Configuration: If this option is enabled then entity will be available in the Global Configurations module and you can configure the entity by creating instances of it there. This setting is relevant only for entities used as reference (if Base Type = BaseEntity).
•Allow in Report templates: If this option is enabled then entity will be available in the Report Template form, in the list Available objects.
•Create System Views: This field is only available for the entities which base type is “Base Request”. If this option is enabled then default system views – All Open, Assigned to me, In My Group, Recently Solved, Unassigned and All Closed will be created for the entity being created.
•Show in Self Service Portal: This field is only available for the entities which base type is “Base Request”. If this option is enabled the entity type is available in Submit Ticket menu in Self Service Portal.
•Can link only one CI: This field is only available for the entities which base type is “Base Request”. If this option is enabled it is not possible to link more than one CI to a ticket of this type. If disabled you can link multiple CIs. Reason for this setting is ITIL rules, saying that for ticket of type Request or Incident only one CI can be attached and for Problem and Change ticket you can attach multiple CIs. This setting can override the ITIL basic rules. Default setting is according to ITIL rules.
•Enable worklog: This setting needs to be enabled to make it possible to connect worklogs to tickets of this type. If setting is disabled the Add Worklog is not shown in ticket form, Worklog tab.
•Enable Checklist: This setting needs to be enabled to make it possible to create checklists to tickets of this type. If setting is disabled this function is not shown in ticket form, Checklist
•Default choice on calendar: enabling this option, specific type of ticket will be showed in ticket calendar by default, for all users who didn’t set up types in calendar settings.
•Phone / Chat fields with icons: Icons can be added alongside Text fields. These are nifty when you use the CTI function by allowing the user to instigate a phone call/chat with a click on a user profile page. The icons are activated using a script:
1. Add property on Person Entity
2. Add the corresponding field in person form,
3.
Run database script to enable the icons:
exec
app.spSetGlobalSetting 'EnableMultipleCtiFields', 'Property1,Property2,…'
where
'Property1,Property2,…'
are the database name of the properties of the fields that shall are to show
icons.
Example:
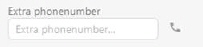
The following set-up
is activated by the script
“exec
app.spSetGlobalSetting 'EnableMultipleCtiFields', 'u_ExtraPhone'”
Note that when have done changes in the global settings you have to perform a recycle of NSP application pool or empty NSP system cache to make the changes take effect.
The last option is provided to add a custom field. These custom fields are added with the existing fields of the base type selected. Using the Add new Entity Field button you can add as many fields as you want for the entity. When you click Add new Entity Field button, one row will be added in this section. This row has all fields set by default. The fields are: Field Name, Display Field radio button, Activate and Delete buttons. By enabling Display Field option, value for the selected field will be used in dropdown list in any other entity’s form field where this newly created entity is referenced. More about how to Add Entity Field is explained in the following section. Also, for each custom field added, options to delete and activate or deactivate are provided in the same row.
Configuration of a user defined entity (which values/instance should be selectable when entity is referenced) is done in Global Configuration -> User Created tab. The field marked as Display Field is used as name in the configuration list.