When you click Add job button, opens a popup with wizard form in four steps.
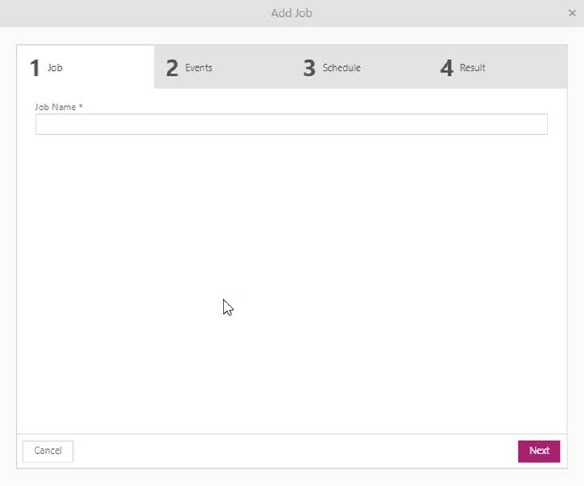
Add job popup – first step
First step is fill in the job name; this field is obligatory. Click on the button next to go to the second step.
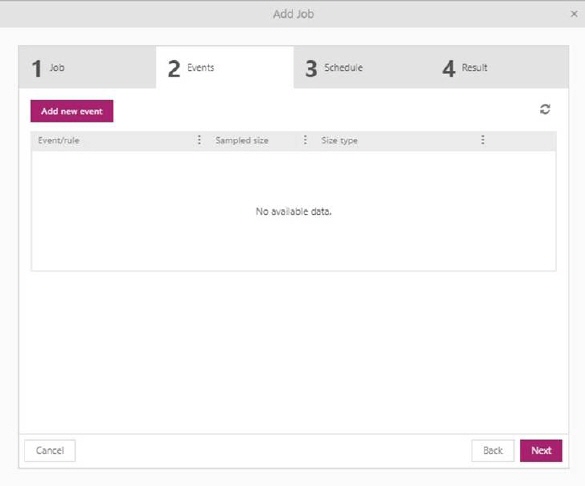
Add job popup – second step
Second step – choose all events you want to do within created entity job. Events are executed in the order in which they are added, one by one. When adding a new event to the created job, you have the option to set up sampled type and size, for example:
Sampled type All – the trigger will be executed for all records found that meet the event requirement.
Sampled type Number – the trigger will be executed for a certain number of random records.
Sampled type Percentage – the trigger will be executed for the percentage of random records.
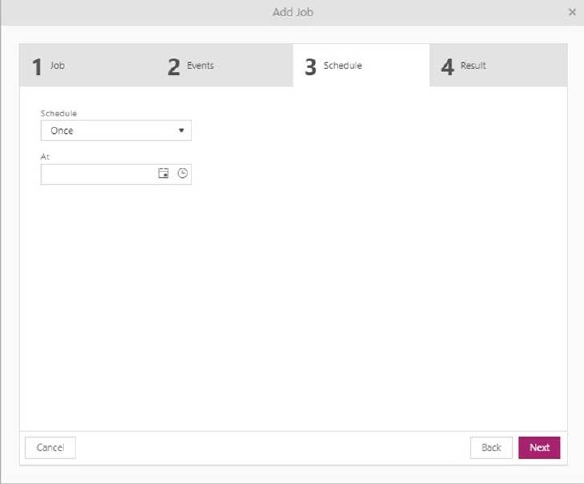
Add job popup – third step
Third step - In the Schedule step you define the date and time interval the job should be generated.
In the form you define the time schedule of the job generation:
Schedule: The frequency; Once, Daily, Weekly and Monthly.
•Once: You select the date and time when the scheduling should be started.
•Daily: Select the number of days between each execution (value= 1 means every day) and hour during the day for the generation (each half hour could be selected in the dropdown or you can enter preferred time).
•Weekly: You can select one or more days in week for job execution. If you want to select all days there is a checkbox, Every day, to check all. You also define the number of weeks between each job generation. The hour during the day can be chosen in the same way as for daily schedule.
•Monthly: Select one or more months (or Every Month) in the same way as for weekly schedule. The day control means here the date in the month and the hour during the day is selected in the same way as for the other schedules.
For Daily, Weekly and Monthly schedule you have to select a Start date for the schedule. End date could be selected by checking one of three different alternative checkboxes: No end date means that the scheduling continues until it is manually stopped. If the schedule should be time-limited, you can select a date to end the scheduling or define the number of occurrences before ending the scheduling.
Use Back button to go to the previous step. Use Next button to go to the last step.
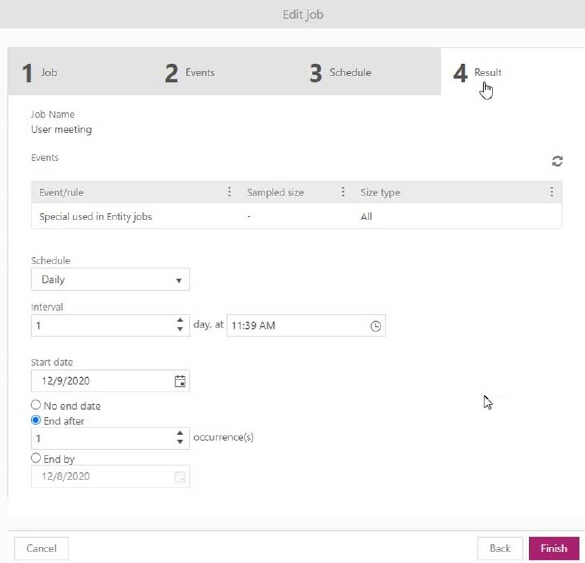
Add job popup – fourth step
Fourth step – result – displaying all data you have added in the previous three steps. It's just a preview before the final save, if you want to do changes, go back to previous steps. To save the created entity job, click the button Finish.