NSP besides the standard also provides scheduled CMDB import.
CMDB – Standard and Scheduled import
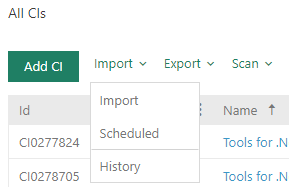
Above a list is Import button, in dropdown choose Scheduled. Scheduled import is done in five steps.
This step contains a list of all scheduled CSV imports. This step is also use for creating new scheduled import, edit or delete existing one.
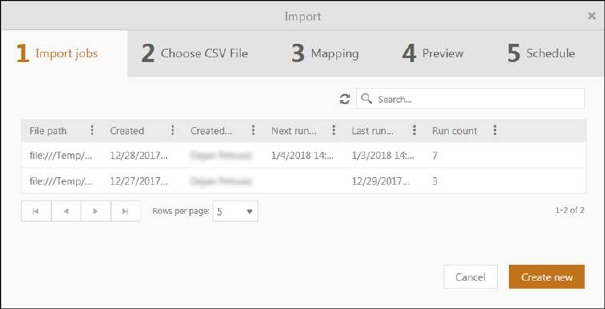
Import job
•File path: Contains file path to the CSV file.
•Created date: Date when the scheduled import was created.
•Created by: Name of user that the created scheduled import.
•Next run date: Time for next execution (date+time).
•Last run date: Time for latest execution (date+time).
•Run count: Number of occurrences the scheduled import has executed.
This list also contains a dropdown action for each row. Available actions are:
•Edit: Uses same form as when you create new scheduled import.
•Delete: Uses for delete scheduled import.
Cancel button closes the form and return to CI List.
Use Create new button to proceed to the next step - Choose CSV file.
Above the list there are a Refresh button  .
.
Search, filtering, sorting and paging functions are similar to other lists in NSP, see section General User Interface. Search function searches for the keyword in following columns: File path and Created by.
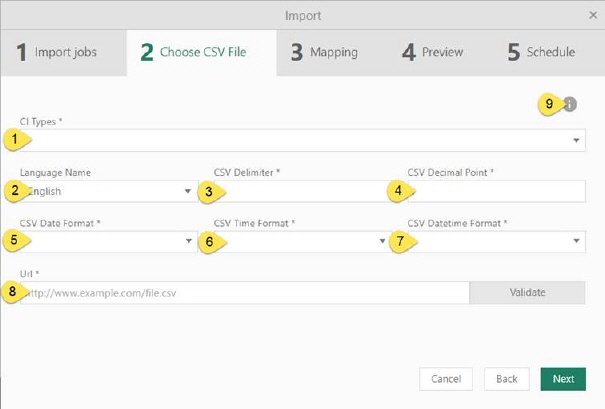
Second step will be the selection of the CI Type of the data contained in a CSV file as well as the selection of the file itself (path and filename):
Import data
The tab Choose CSV file contains following fields:
1. CI Type: Mandatory field. Choose CI type from dropdown list (the type that the CSV file contains data of).
2. Language: Choose import language. Language of the property values in CSV file.
3. CSV Delimiter: Mandatory field. Type symbol for separating columns in CSV file.
4. CSV Decimal Point: Mandatory field. Type symbol for decimal point used in CSV file.
5. CSV Date format: Mandatory field. Choose date format used in CSV file from dropdown list. Date format can also be edited.
6. CSV Time format: Mandatory field. Choose time format used in CSV file from dropdown list. Time format can also be edited.
7. CSV Date and Time format: Mandatory field. Choose date and time format used in CSV file from dropdown list. Date and time format can also be edited.
Note: All dates in CSV file must have the same format!
8. URL: Mandatory field. Choose file path to the CSV file containing the items that shall be imported. Only CSV format is allowed, and must be saved with UTF-8 encoding.
Example: file://name/catalog/importfile.csv
Click Validate button for validation file extension and file path.
9. This step also contains info button, which opens popup with more information about Scheduled CSV Import. In popup there is a link to open user manual for this function.
Back returns to the previous step, Import jobs.
Use Next button to proceed to the next step, Mapping.
In the Schedule step you define the date and time interval the CSV import should be generated.
In the form you define the time schedule of the import generation:
Schedule: Type of schedule, selectable values in the dropdown are Once, Daily, Weekly and Monthly.
•Once: For this schedule a date and time picker is displayed where you select the date and time when the import should be generated.
•Daily: For daily schedule you can select the number of days between each execution (value= 1 means every day) and hour during the day for the import generation (each half hour could be selected in the dropdown or you can enter preferred time).
•Weekly: When weekly schedule is selected a checkbox for each weekday is displayed. You can select one or more days in week for import execution. If you want to select all days there is a checkbox, Every day, to check all. You also define the number of weeks between each import generation. The hour during the day can be chosen in the same way as for daily schedule.
•Monthly: For monthly schedule a checkboxes for each month is displayed and you can select one or more month (or Every Month) in the same way as for weekly schedule. The day control means here the date in the month and the hour during the day is selected in the same way as for the other schedules.
For Daily, Weekly and Monthly schedule you have to select a Start date for the schedule. End date could be selected by checking one of three different alternative checkboxes: No end date means that the scheduling continues until it is manually stopped. If the schedule should be time-limited you can select a date to end the scheduling or define the number of occurrences before ending the scheduling. NB: The number of occurrences means the overall total number, e g if this import has been generated 3 times in the past and you want to execute it 3 more times, you have to set the value to 6.
Use Back button to go to the pervious step.
Use Save button to schedule CSV import.