Facility CIs are CI properties that allow you to configure each CI and assign it to a specific location, i.e. facility within your internal organization. To enable this feature, go to:
Configurations > Global function settings > Enable facility properties.
After the feature has been checked in Global function settings, you can start configuring your facilities.
There are four facility types:
•Management – e.g. organization name, like Nilex
•Building – e.g. Headquarters
•Floor – e.g. Ground floor
•Room – e.g. Conference Room
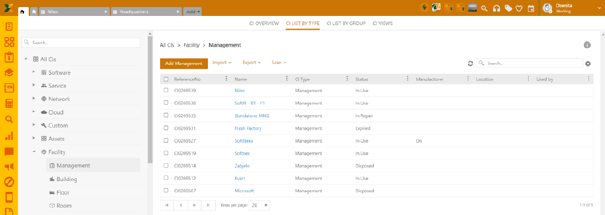
To start associating these facilities to your existing or new CIs, start by adding them from the CMDB section. You can add each facility type from the left panel, by clicking Add Management /Building /Floor /Room.
Adding CI facilities from the left panel
When adding facilities through this method, you will have to set the Name, Status and parent facility type for each property except Management, which is the highest-ranked property. To find the adequate parent, you can either start typing the name of the facility or choose from the drop-down menu.
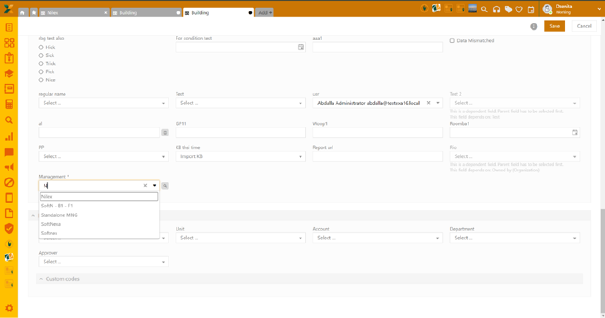
Add facility form: Associating facilities
Another way to add
your facilities is to create one parent type, for example, Management named
Nilex. Now you can start adding its children's facilities through the activated
facility tab. From the Building CI, then further you can add Floor, and finally
Room. Number of allowed facilities is unlimited. Note: In case you don’t see the
changes immediately after saving, try refrehsing the tab by using the refresh
symbol above the grid  .
.

Adding CI facilities from the Facility tab
Finally, you can add facilities properties by importing the CSV file. CSV file must contain the property values formatted with middle dash, like this:

CSV format: Example values
Imports are available from the grid, choose one of the options Direct or Scheduled import and start entering and mapping your values.
1. Step
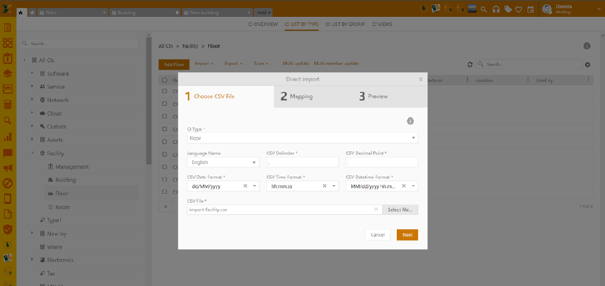
2. Step
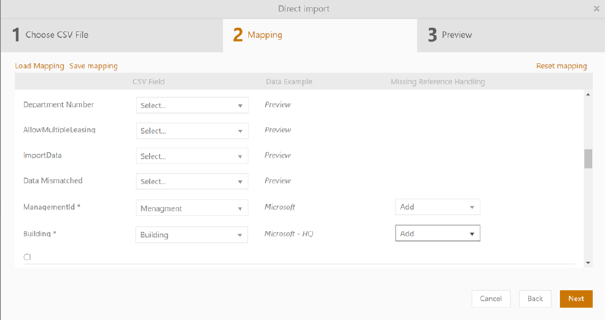
3. Step
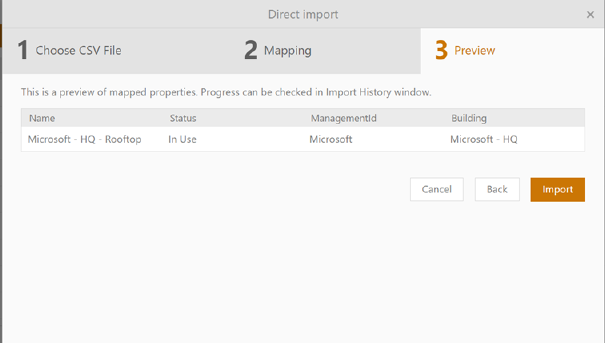
Import form
Once clicking the Import, you’ll see your facility CIs in the grid list.
Adding facilities to the existing CIs
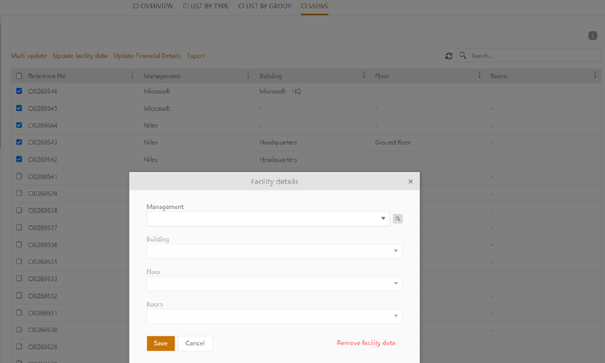
To associate facilities with
the existing CI, go to the CMDB, pick any CI, and choose three dots  above the grid (top right). Click on Facility details, after
which you’ll see the configuration form. Start typing or choose the available
options from the drop menu.
above the grid (top right). Click on Facility details, after
which you’ll see the configuration form. Start typing or choose the available
options from the drop menu.
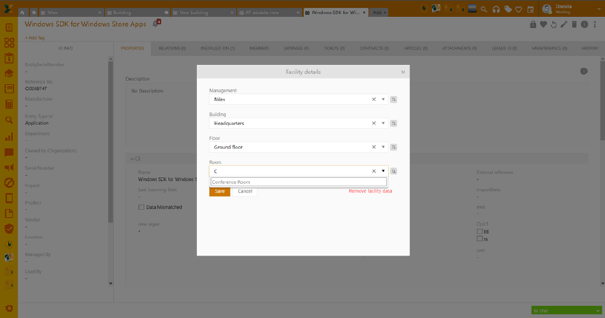
Facility details form
After saving all your data, facility details will be shown in the Property tab.

Facility details: Property tab in simple mode
To remove the associated facilities, follow the same instructions as above, go to Facility details and click on the Remove facility details option bottom right.
Status change, update and delete
As in any other CI, you can change the status of the facility CI by using the status bar in the simple mode (bottom right). When changing the status of the facility which has children items associated with it, you’ll see a pop-up prompt where you can either choose to change the status of the selected facility or opt for the changing status of all its children.
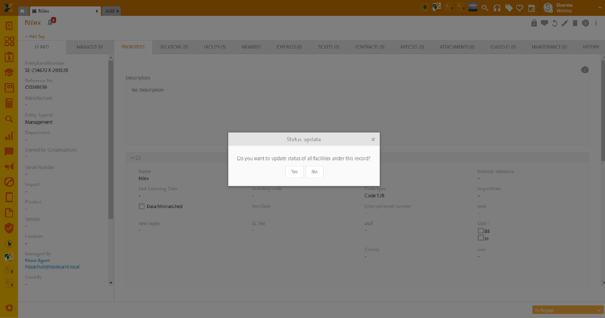
Facility CI: Status Change
When changing the status of connected facilities, make sure that the target status is allowed for all facilities. For example, if you have set the specific stages for the certain facility property (Configuration > Entity Lifecycle), you won’t be able to use the bulk status change option. You’ll receive an error message “Selected status is not allowed in the related child item's stages”.
Single and bulk deleting of facility CIs is allowed provided it has no related CIs. Note: When deleting a parent item, you’ll be notified that its children will be deleted as well. You’ll also see the list of all related CIs.
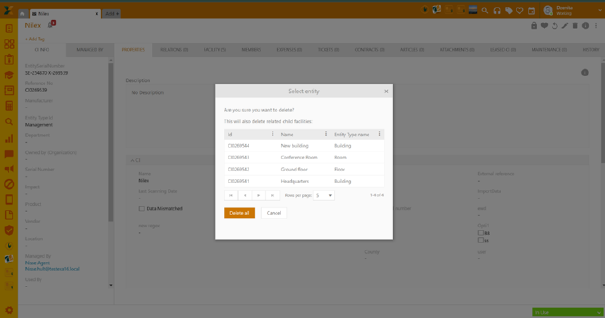
Facility CI: Delete
CI View: Update facility data
History logs
Each change made to the facility's properties will be recorded in the logs. Additionally, when you delete a facility CI that has a parent, the logs will be recorded in the parent history tab.
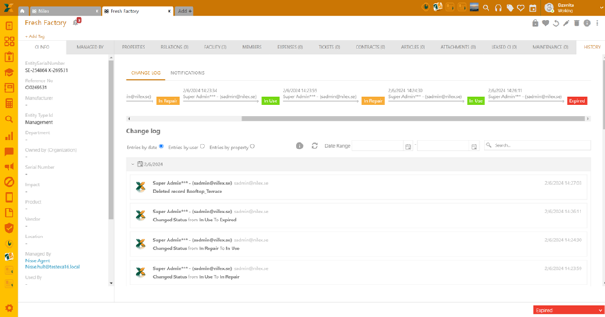
Facility CI: History logs
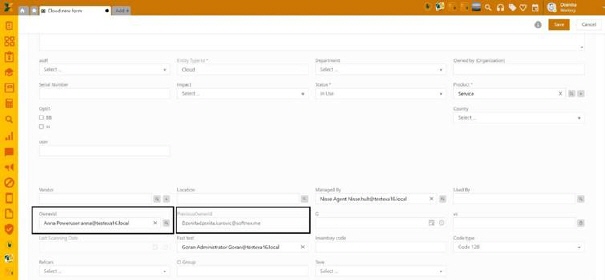
CI: Owner and Previous Owner
The novelty in the notification system is that you can now add Owner and Previous Owner to the recipients list. You’ll set them under Concerned people.
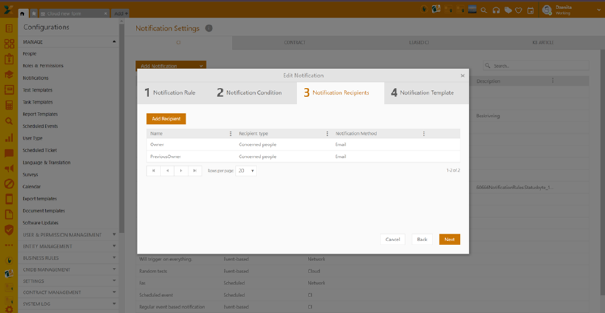
Notification settings: Concerned people