In this step you fill general information of the scanning session
Add scanning session
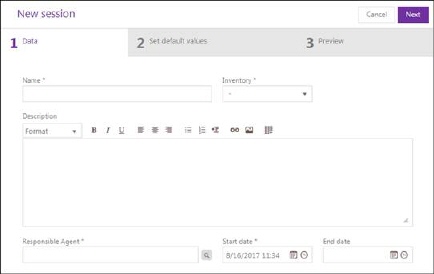
Following are fields in Data form:
•Name: Required field, insert name of the Scanning session.
•Inventory: Required field, from dropdown list choose Inventory Scanning that the scanning session belongs to.
•Description: Description of scanning session. There are formatting tools to format text, and you can add images and links.
•Responsible Agent: Required field, choose agent which is responsible for this session. This field is auto-complete and also contains browse form for ease of reference. You can search for an agent in NSP which will be assignee on ticket.
•Start Date: Required field, choose date when the scanning session becomes active.
•End Date: Choose date when the scanning session becomes closed.
When you finished use Next button or click on Set default values tab to proceed the next step.