
JIRA is a functional management tool that tracks errors, tasks, project management and reporting. The purpose of integrating with NSP is to ensure that similar records are created in both environments. Content developed on NSP or JIRA will therefore be moved to the other platform. For instance, a ticket created in NSP is also moved to JIRA. Or, when a comment is written on a ticket on JIRA, it is possible to write a comment on same ticket on NSP.
Step 1 - JIRA Setup
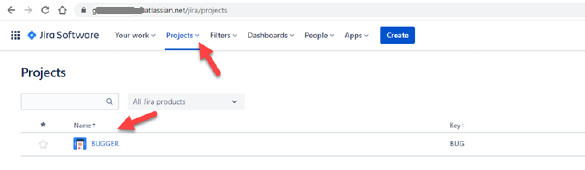
Before starting setup, you must have an account at Jira and a project on it.
Jira projects (example)
In addition, to continue installation, you need to generate an API token on JIRA.
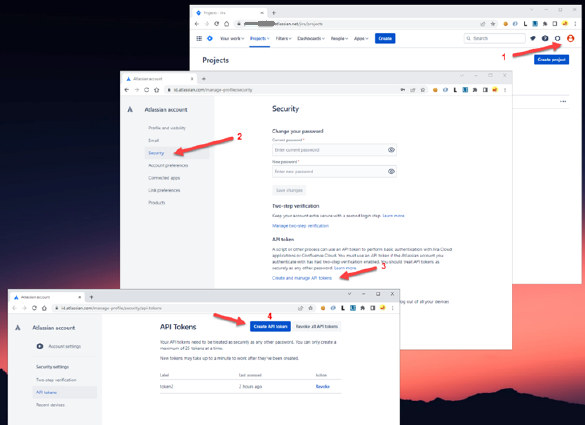
Generate API Token (example)
After creating the api token, it’s most important to keep this information.
Step 2 - Integration settings for Jira
Following creation of token in Jira, NSP integration page opens.
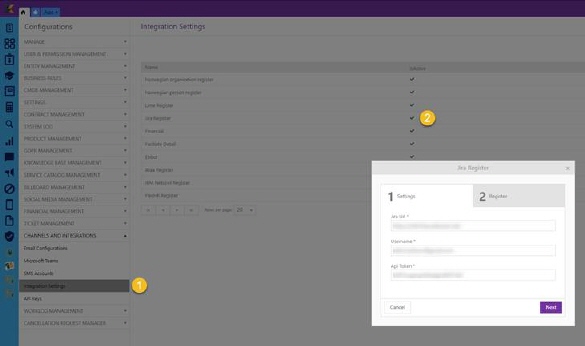
Integration setting (NSP)
At this setup screen you will be prompted for Jira details. This information is important for connecting to your account on Jira and creating content.
Jira Register settings tab
•Jira Url: Jira address where your Jira account is located.
•Username: Your e-mail address associated with Jira account.
•Api Token: API token created on Jira account.
Click on next button on same screen. If information is correct, it will move to next screen. Otherwise, it will throw an error.
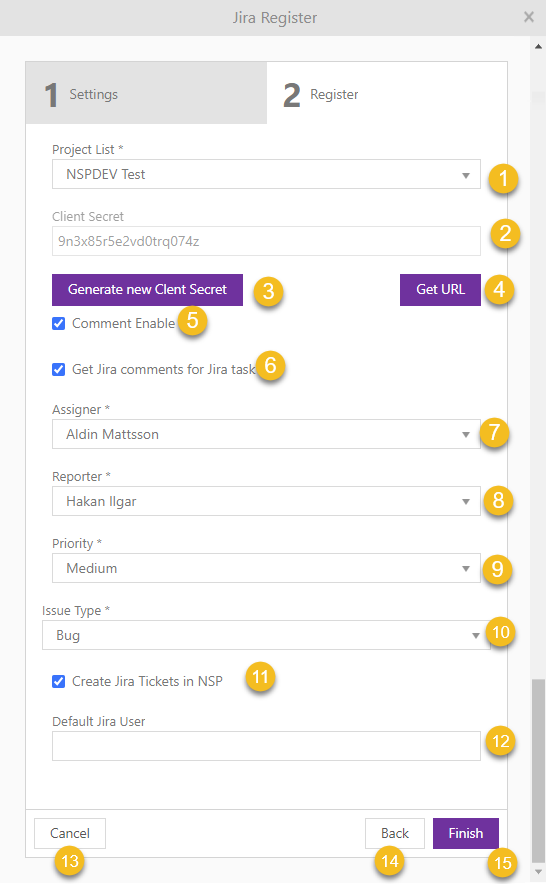
On next screen, your Jira account information will appear. From here, selections related to Jira are made and saved.

Jira Register settings tab
1. Project List: Lists projects on Jira
2. Generate new Client Secret: This section is very important for webhook (will be explained later). A URL address will be generated through this field. Jira needs this URL address for identification and access to NSP.
3. Get URL: Generate url with the newly create client secret
4. Comment Enable: Determines whether created ticket will be open for comments. If this option is selected, comments will be written on tickets. If not, there will be no comment posting.
5. Get Jira comments for Jira task: If selected, process of receiving comments from other source continues. Otherwise, it will not receive comments.
6. Assigner: Indicates to whom ticket will be assigned
7. Reporter: Determines who will report ticket
8. Priority: Determines priority status of ticket to be created
9. Issue Type: This is used to determine which ticket type to create
10. Create Jira Tickets on NSP: If selected, tickets created on Jira will also be created in NSP.
11. After all information is given, form is registered. If there is an error, message will be received.
12. Default Jira User: Determines by which user ticket will be created
13. Cancel – cancel the configuration.
14. Back – navigate back to previous tab.
15. Finish – finish the configuration.
Webhook
A webhook is a user-defined callback over HTTP. You may want to notify your app or web app when certain events occur in Jira. For this, you can contact your application by using this link. For example, you can alert your remote application when an issue is updated or a sprint is started.
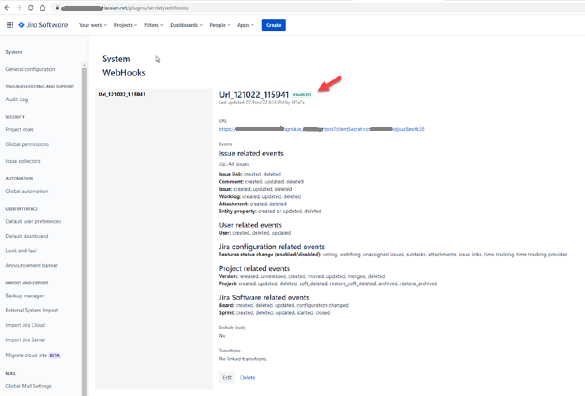
To access this area, you need to go to webhook area on your Jira page. And, in setup screen of NSP, this part will be created automatically in JIRA. We can define this part as Jira to NSP communication method. Upon creation of the webhook most user-, project- and Jira related events are pre-enabled per default. For more information about webhooks please visit Atlassian support webpage.
WebHook (example)
Step 3 - NSP Trigger
This setting must be made in order to communicate with Jira over NSP. Also, we can define this part as NSP to Jira communication method. Tickets created on NSP will be transferred to Jira with this method.

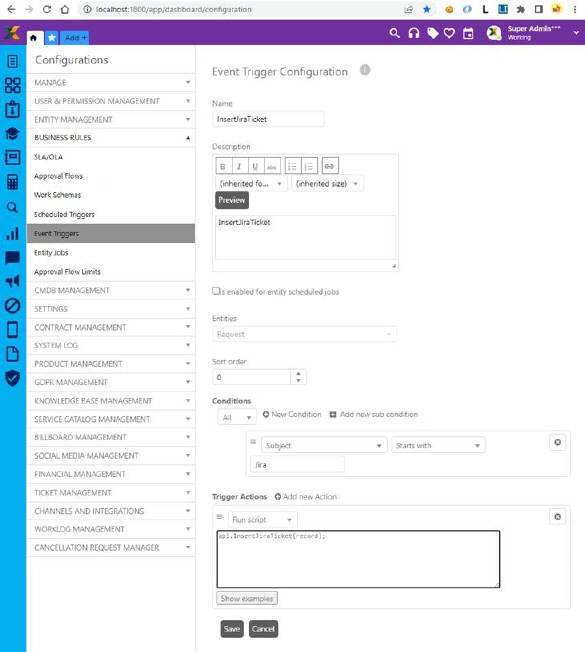
Event trigger for creation of Jira tickets
"Event Triggers" screen is accessed from the NSP settings. From here a new event trigger called "InsertJiraTicket" needs to be added. And for this trigger to work, a condition must be specified in “Condition" field that can invoke Jira. You can see example above.
Creating ticket step definition NSP to Jira
1. Features
•Creating a ticket in both environments and transferring it to other environment.
For example, a ticket created on NSP will be created simultaneously on Jira as well.
•Comments work just like tickets. At the same time, similar comment will be added to same ticket in the other side.
•Attachments can also be transferred to other side, just like a ticket.
2. NSP to Jira
a. Create Ticket
As it is known, we created Event trigger on "Jira" keyword. If ticket title starts with this keyword, we will have created same content in Jira.
Jira trigger activation upon creation of tickets (example)
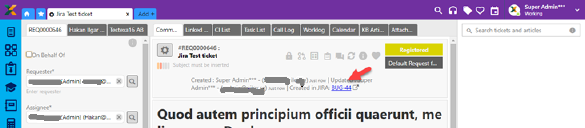
After ticket is created, Jira ticket information can be seen in the ticket detail section.

Jira ticket (example)
In addition, Jira icon will be displayed in the ticket view list for this ticket type.
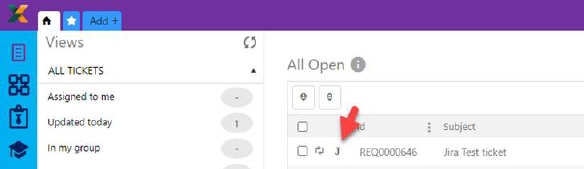
Jira ticket identification
This ticket will be created in Jira as follows.
Jira ticket identification
Create Comment
You can write a comment on a Jira ticket that was previously created on NSP. This comment will also be added to a similar record on Jira. For this, Jira icon needs to be selected.
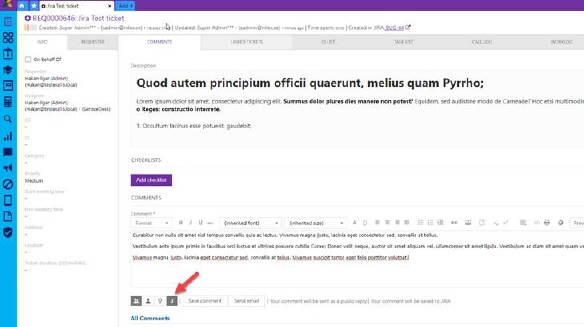
Jira ticket comment (example)
Same comment will be rendered on Jira as below.
Jira ticket comment (example)
Creating ticket step definition Jira to NSP
First of all, you need to have a project on Jira. And this project needs to be defined during NSP Jira setup. Otherwise, if you don't have a project on Jira, this content will not be sent to the NSP side.
Jira projects (example)
Also, Jira webhook setting should work correctly. This situation is very important. Otherwise, no records can be transmitted to the NSP side.

Webhooks (example)
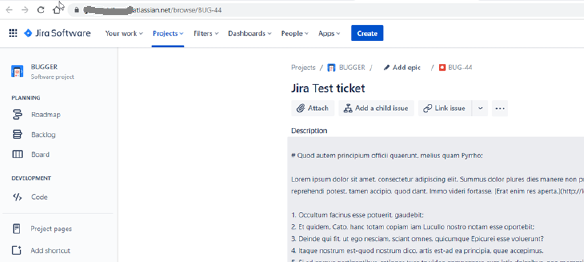
Create Ticket Jira to NSP
We want to create a ticket in Jira. And we will create a new ticket by selecting an active project. The following screen will appear.
Jira ticket (example)
Project - at the top we need to choose which project we choose in the NSP setup screen.
Issue Type - determines the type of ticket to be created
Status - we select the ticket status
Summary – title of the ticket
Description - we determine the ticket content with Summary and Description,
Priority - we choose priority status of the ticket
Create Comment
Comments created in Jira will be rendered in NSP and can also be used with attached files. Comments rendered in NSP will have Jira icon visible.