Lock CI Verification is an addition to the Lock CI feature. It enables additional verification of the CI by a specific user.
To activate the option, click the padlock icon above the CI grid on the right:
Lock CI
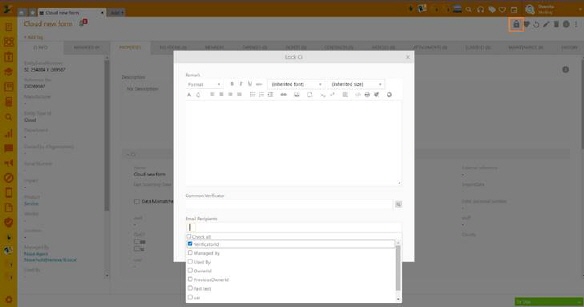
Click on the padlock icon opens a pop-up giving you options to leave a remark, i.e. explain why the CI is being locked, a field where you set the CI Verifier – a user who should verify/validate this CI and a dropdown list of users to choose from, who will then receive a notification that the CI was locked.
Note that none of the fields are mandatory but are highly recommended when using this option to keep the concerned people aware of the changes.
CI can be locked by any agent who has permission to add and edit CI. Immediately after locking, the locked CI will have a padlock icon next to each tab for other users indicating it cannot be edited. Hover over the padlock icon in the top right shows the information of the user who locked the CI.
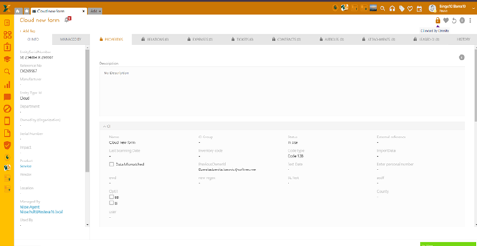
Locked CI
Once locked, the CI can be unlocked by the following users:
1. Agent who locked the CI
2. Verifier (if set)
3. CI Owner
4. Role with permission to lock/unlock all CIs (you can set this user in the Roles & Permission section).
The CI can be locked and unlocked from both Agent portal and Self-Service portal.
When a verifier is determined, they must hand-sign the form to unlock the CI. The Verifier can also choose to checkmark the Keep locked box, which means that CI is not verified yet and may need further improvements.
On SSP, when a locked CI is opened, the agent will see the button “UNLOCK CI” on the top right with an option to view the remark. View remark will open in a pop-up window and will show a message left by the user who locked the CI.
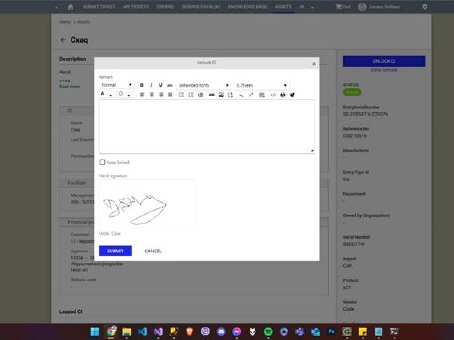
SSP CI Verification form
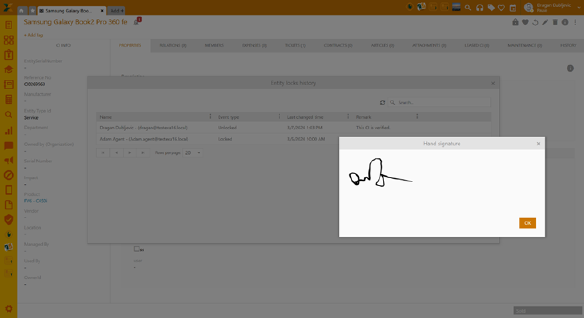
On the Agent portal, unlocking the CI is performed in the same manner as the lock with the addition of the hand signature. The remark will be available in the detail grid in the Entity Locks History section (from the CI grid menu).
Entity locks history
 Entity locks history: Detail
grid
Entity locks history: Detail
grid
CI Views
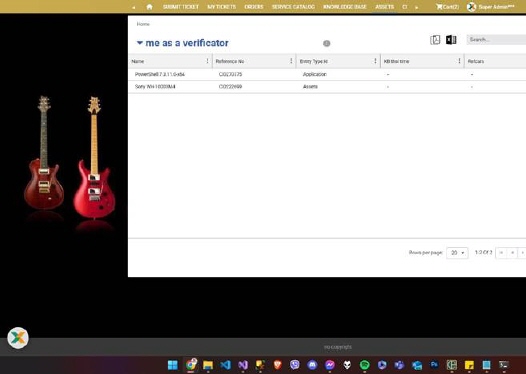
You can set up a custom view to see all CIs pending your verification on the agent portal.
Go to Configurations > Entity Management > Views > Entity views
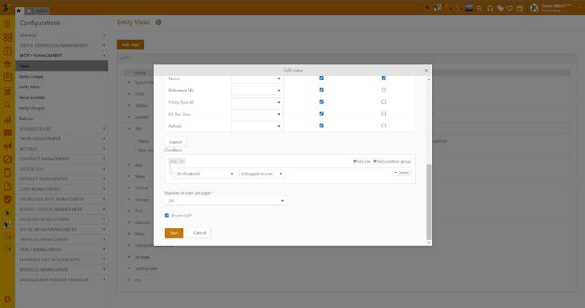 Entity Views: Add view
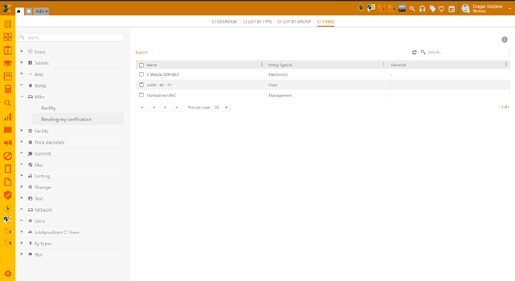
Agent portal: CI Views
On the SSP, you’ll have a system view in the Assets dropdown list.
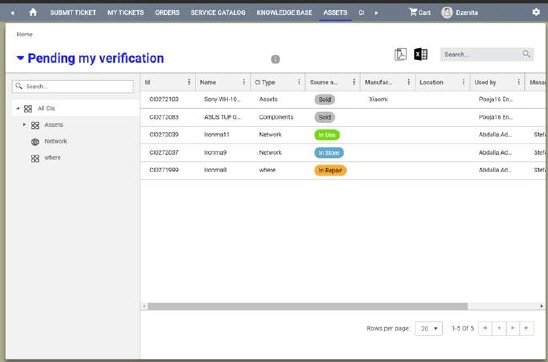 SSP Assets: CI Verification view
However, you can still make custom view that contains various conditions. Same as when setting up the view for the agent portal, you will just mark the option Show in SSP if you want to set the custom CI view in the SSP.
SSP Assets: Custom View
Notifications
The notifications are sent through the system text template but can be further configured if wanted.
Emails will be sent to users you have marked in the 3rd field of the lock CI pop-up (see top of the article). The Verifier will be pre-selected in the email recipient list by default, but you can still unmark them and choose not to forward the notification to them.
Each selected recipient will receive an email notification with the information the CI was locked by the respectful user. The message will also contain a link to the CI on the Self-Service Portal.
This is how the email template is currently configured:
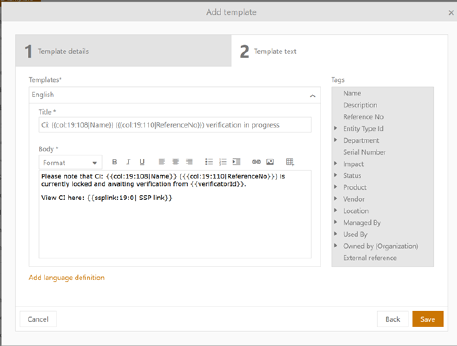
CI Verification: Email text template
Left Panel
Panel of the form contains general information respectively the default properties of CI. All fields shown in panel is non-editable. When you click the fields: Product, Vendor, Used by or Managed by a popup shows information about selected property.
If CI has defined Managed by and/or Used by person information of those users is shown in separate tabs:
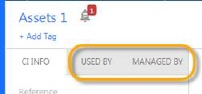
CI Info tabs