In this step you define default values for CI properties which will be automatically applied to asset properties when it’s scanned (checked) in that session.
Scanning session defaults contains no predefined properties, and it’s up to an Inventory manager to define them for each scanning session.
Just above the table is button Manage default properties and by clicking that you can add default properties for CI.
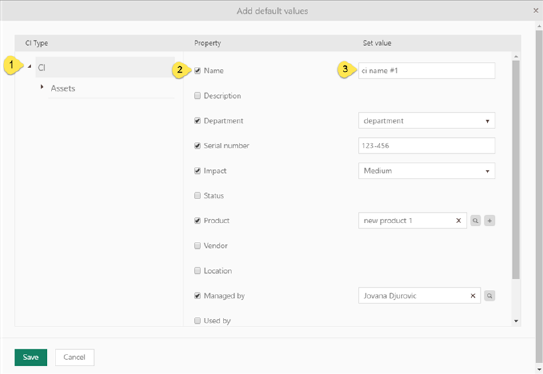
Set default values in scanning sesion
Form has two parts. In the left panel there is the tree list with all the CI types. Use arrows (1) to expand/collapse Ci Type and click on CI type for which you want to predefine properties default value. Due to selected type list of properties is changed. List display properties associated with chosen type.
Each property contains checkbox (2), click on the check box in front of the property name indicated that the property will be added to the list of the scanning session defaults. It also displays text input control (3) for the property where default value can be set.
Unchecking of the checked property effectively removes the property from the list of the scanning session defaults.
Depending of property type Set value field have different behavior (text, number, dropdown, radio button, etc.)
When you finish with setting default properties values click Save button and all changes will appear in the list. Table offer possibility of editing and deleting default property values.
When you finish, use Next button or click on Preview tab to proceed the next step.
Use Back button or click on Data tab to go to pervious step.