This feature enables administrators to customize the appearance, content, and user restrictions to the NSP Self Service Portal by adding folders, internal and external links, which will reflect on the SSP homepage navigation section.
SSP Navigation section in Administrator portal shows the list of available navigation items and CTA button Add SSP Navigation item.

This list contains a dropdown action for each listed item. Standard actions for each navigation item are:
Edit: Used to edit all item details (Link details, Link type and Access scope)
Activate/Deactivate: This option is used to activate/deactivate configuration.
Delete: This option is used to delete items.
Add subtype: Available only for folders.
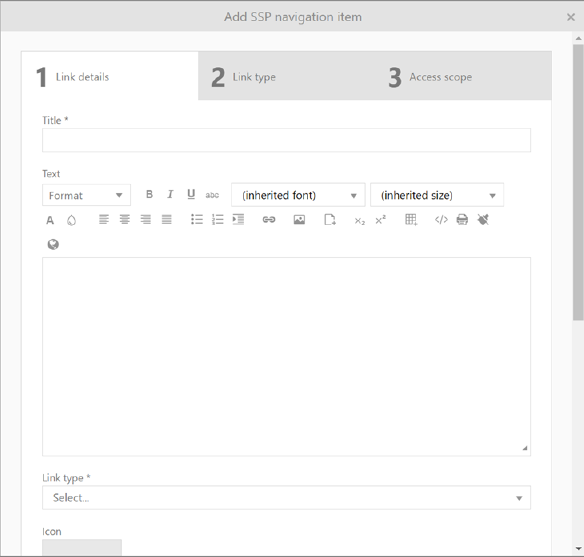
Clicking Add SSP Navigation item opens pop-up window with 3 steps: 1) Link details, 2) Link type and 3) Access scope.

1. Link details tab contains the following fields: Title*, Description, Link type*, Icon, and color selection option.
2. Link type is chosen from the dropdown list in the previous tab where administrator can choose one of 3 options: Folder, Internal or External link. Based on the selected type, the following views will be opened:
a.) Selecting the folder will immediately take you to step 3.
b.) Selecting an Internal link will open the pop-up screen with the option to choose a link from one of the five sections: System, Ticket Form, Service Item, Knowledge Base or Announcements. Check the Content box, to select from the available contents. Additionally, you can enter the path manually, for example: app/knowledge-base.
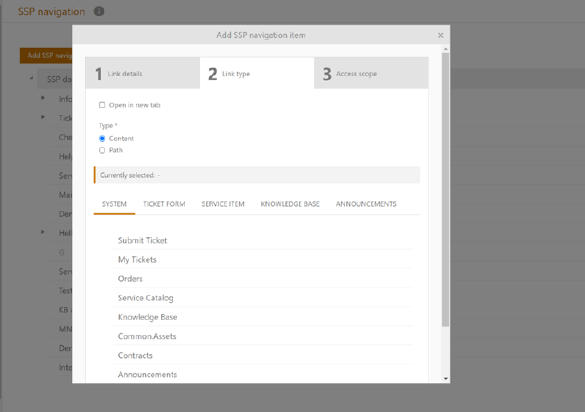
SSP Internal navigation link
For Internal and External links, you can choose if the link opens in a new window by ticking the checkbox.
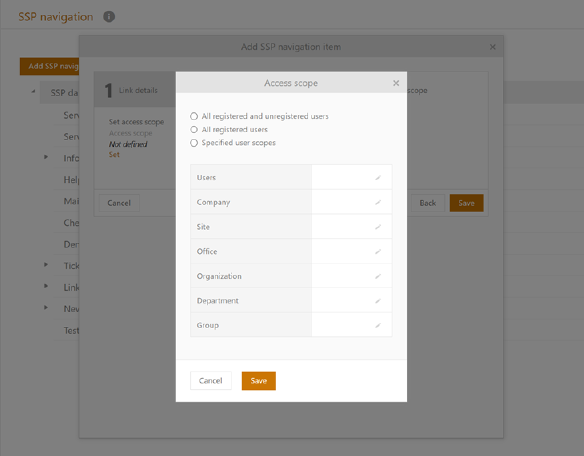
3. Access scope is the third step, where the administrator can set the viewing permissions. Setting access is not mandatory and can be left undefined. Access permissions can be set for three levels:
a.) All registered and unregistered users - available to anyone with the link.
b.) All registered users - available only to registered users
c.) Specific user scopes – available only to specific users which you need to specify at list user account, and if needed Company, Site, Office, Organization, Department and Group.