The Email Campaigns feature allows you to distribute announcements, offers, or notifications to your customers through the NSP forms. To set the email campaigns, you need to go through the following steps:
2. Create text template for the campaign
3. Define campaign categories
4. Create an email campaign.
Campaign text templates
Text template is used for creating content you want to distribute to specified users via email.
Go to Manage > Text templates > Entity text templates > Email > Add template
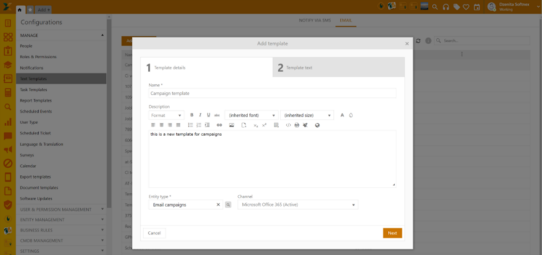
The campaign text template has 2 main tabs: Template details and Template text.
In the template details tab, you will need to enter: Name, Description (optional), Entity type (choose Email campaigns), Channel (your active email configuration).
Campaign text template: Template details
The next tab is about the content of the template. Here you will enter the title of your email, and the body text. You can have a simple text or use tags available on the right section of the screen.
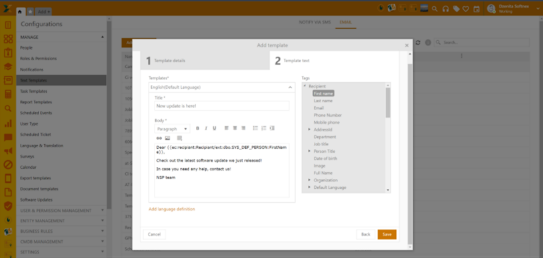
Campaign text template: Template text
You can add as many text templates as you need.
Campaign categories
This is where you define campaign categories for easier management.
Go to Channels and integrations > Email campaign categories
By default, the parent category is the Email campaign. You can add all new categories as subcategories of this parent. Or, once you create new categories, you can further nest them, as pleased.
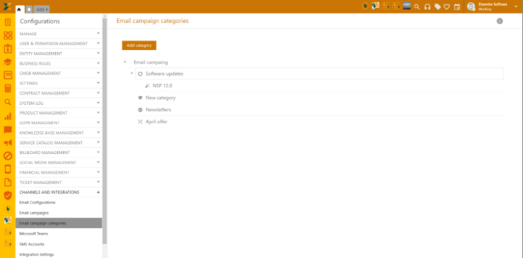
Email campaign categories view
To add a new category, click Add and choose the parent category, enter the category name, and optionally add a description and an icon.
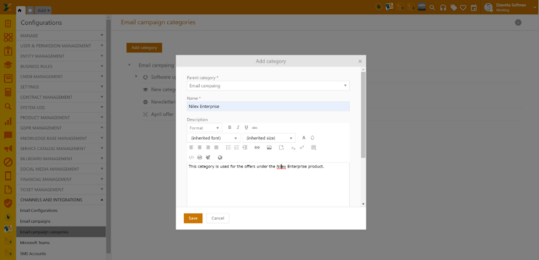
Email campaign categories form
Each category, except for the Email campaign, can be edited or deleted through the grid options on the right.
Email campaigns
Configurations > Channels > Email campaigns
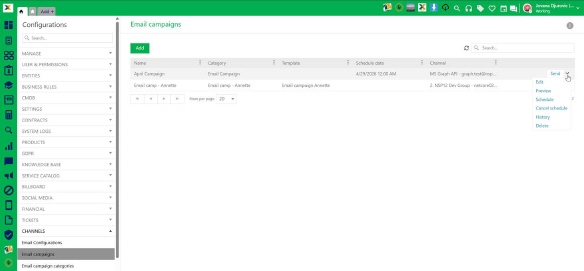
Email campaign: Grid options
The Email Campaigns displays a list of all created email campaigns within the system. Each campaign is shown in a table with key details, including the campaign name, category, template, scheduled date, and communication channel.
At the top of the window, the Add button allows users to create a new email campaign. Selecting this option opens a form to define campaign details.
Each campaign in the list includes an action menu that provides the following options:
•Send – Immediately sends the email campaign to the configured recipients. This action bypasses any scheduled date and triggers instant delivery.
•Edit – Opens the campaign in edit mode, allowing you to modify details such as the name, template, recipients, or scheduling settings.
•Preview – Opens a popup window where you can select a recipient and send a test version of the campaign. This allows you to review how the email appears in a real inbox before sending it to the full audience.
•Schedule – Allows you to define a specific date and time for the campaign to be sent automatically. Once scheduled, the campaign will be delivered according to the defined timing.
•Cancel Schedule – Cancels a previously scheduled campaign. The campaign will not be sent unless it is rescheduled or manually triggered.
•History – Provides a log of past activities related to the campaign, such as send attempts, status updates, and other relevant events.
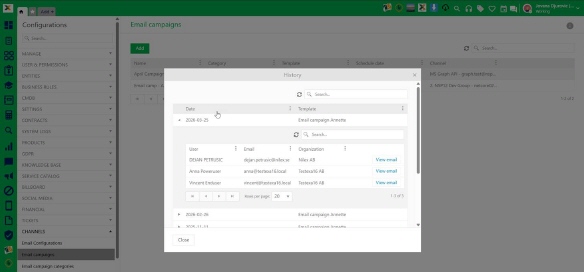
Email campaign: History
•Delete – Permanently removes the campaign from the system.
Creating email campaign
The Add Email Campaign form is used to create a new campaign by defining all required details. The campaign form has the following fields:
•Name - Specifies the name of the campaign. This field is mandatory and is used for identification in the campaign list.
•Category - Allows selection of a campaign category from the dropdown. This field is required and helps organize campaigns.
•Email Content - A rich text editor used to compose the email body. It supports formatting options such as font styling, alignment, lists, links, images, and other content elements.
•Use Template - When enabled, allows the user to select and apply a predefined email template instead of manually entering content. In this case field: Email Content will be hidden and the field: Template will be displayed to choose a template from the available options
•Channel - Defines the communication channel through which the email will be sent (e.g., configured email service).
•Recipients - Specifies the target recipients of the campaign. This field is mandatory.
At the bottom of the form:
•Save - Creates the campaign with the defined settings.
•Cancel - Closes the form without saving changes.
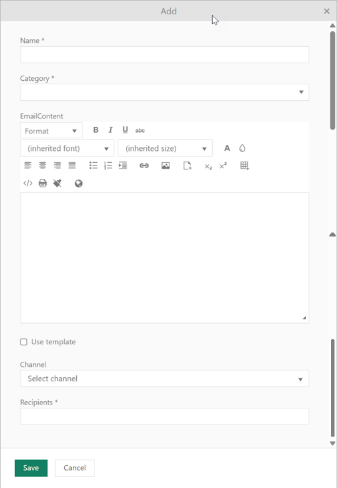
Add email campaign form