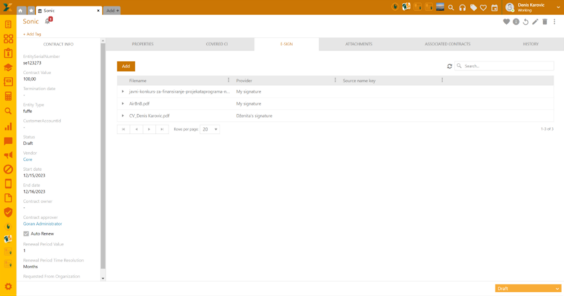
Tickets, Contracts, CIs, and Knowledge Base articles have a particular tab E-Sign.
Agent portal: E-Sign View
Go to any of the abovementioned sections on the Agent portal, for example, Contracts: select any contract and go to tab E-sign, click Add and the signature form will pop up. The form has 4 fields:
1. File path – Here you will update your document. The only allowed format is PDF
2. Signature – Here you will choose from the available signatures
3. Users – Enter emails of people who need to sign the contract (once you start typing, autocomplete will activate)
4. Description – This is an optional field and should be used to add more clarification regarding the document to be signed.
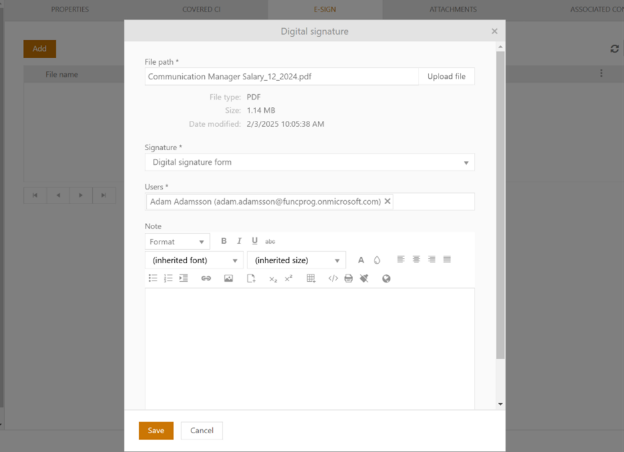
Agent portal: Digital signature form
Once the document is submitted for signatures, you can track its status from the E-sign tab. After the document is signed, you can download it from the grid menu.
Note that you can download unsigned and signed versions.
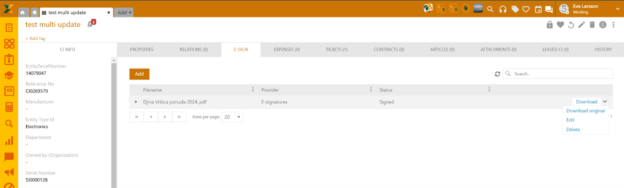
AP: Grid menu actions
You can also delete the document you submitted for signature not yet signed by all parties; in which case the status will be changed to Completed with flag x meaning the file is Cancelled.
E-sign: Cancelled document
You can also submit documents for signature via the Document templates. Open any contract, ticket, KB, etc, click on the 3-dot menu, choose the Document templates and select from the available templates in the list. Right click on the grid actions and select E-sign.
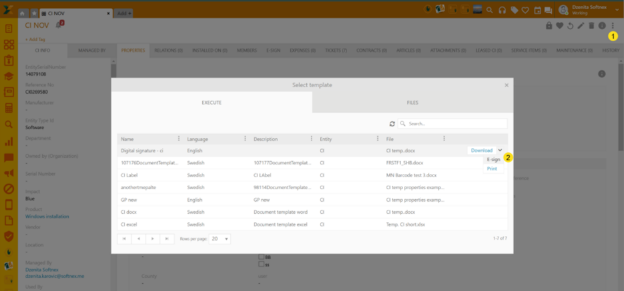 E-sign
via Document templates
E-sign
via Document templates
E-sign SSP
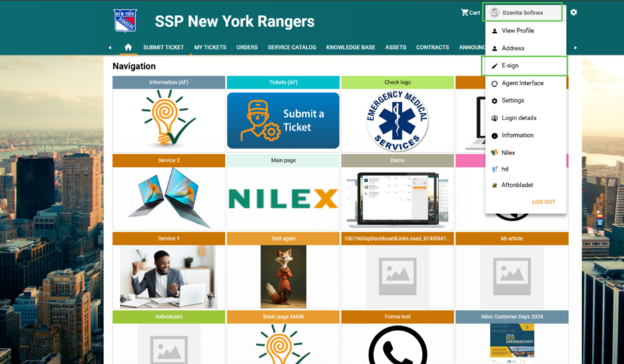
Documents waiting for your signature are stored in your SSP account menu.
Go to your account > E-sign
You will see the list of all documents submitted for your signature, with the filename, submission date and the signed status.
The files are sorted within 3 columns:
1. Waiting for me – for files waiting for your signature
2. Waiting for others – for files waiting for signatures by others
3. Completed
a. Files signed by all parties - Flagged X
b. Rejected and Deleted files – Flagged ✓.
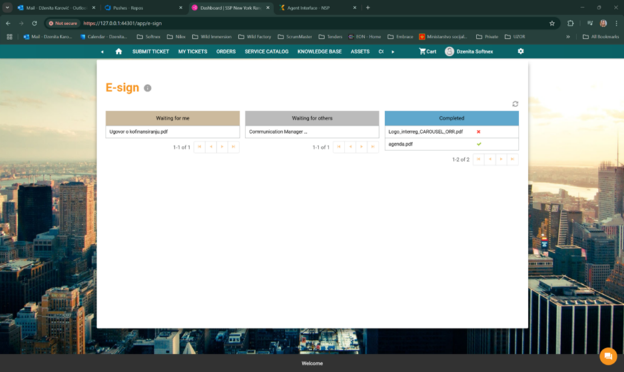
SSP: E-Sign overview
As a signatory party, you’ll receive an email or SMS notification that you have documents to sign, if the agent has enabled notifications for this document.
To sign the document, hover over the document and click View (on the far right of the grid). The screen is now split into 3 main parts:
1. Upper left side: Document preview
2. Right side: List of signatories and signed status
3. Bottom left side: Signature options
a. Type: Just type in your name using a keyboard
b. Draw: Use your mouse or touchpad to sign
c. Image: Upload an image of your signature.
After applying the desired signature type, click Save. Other signatories of the file you signed will see your signature status in their E-Sign overview.
SSP: Applying the digital signature
You can download original and signed versions of the document from the grid menu.
SSP: Grid menu actions
You can also reject the document by clicking the Reject option and leaving the remark (which is mandatory).