vScope integration imports hardware inventory data from vScope into Nilex Service Platform (NSP). It connects to a vScope instance via REST API, downloads device data in CSV format from a table preset, and creates or updates Computer CI (Configuration Item) records in NSP.
You configure column mappings between vScope attributes and NSP CI fields. NSP supports automatic mapping suggestions, custom field matching for duplicate detection, and scheduled recurring imports.
Prerequisites:
•Admin access to NSP Admin Portal
•A running vScope instance accessible from NSP server
•A vScope API Key for authentication
•At least one table preset configured in vScope that includes a UUID column.
Generating a vScope API Key
You need an API Key from vScope to authenticate. Follow these steps to generate one:
1. Open your vScope web interface in a browser (e.g., http://vscope-vm:80).
2. Log in with an admin account.
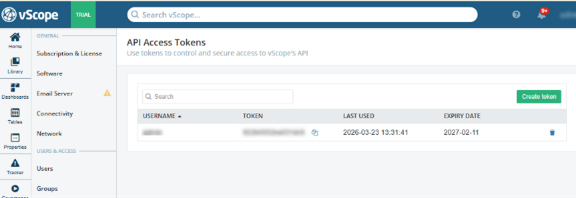
3. Navigate to Settings > API Access Tokens.
4. Click Create token.
5. Copy and save your token key. You will enter this value in NSP.
vScope API Key generation
Creating a Table Preset
A table preset defines which device columns vScope exports. You need a preset that includes a UUID column.
1. In vScope, open a Table view for your devices.
2. Add columns you want to import (e.g., UUID, Name, IP, MAC, Serial Number, Vendor, Model, OS).
3. Save this view as a Preset. Note its name and ID.
4. Verify UUID column is included. NSP requires UUID for device matching.
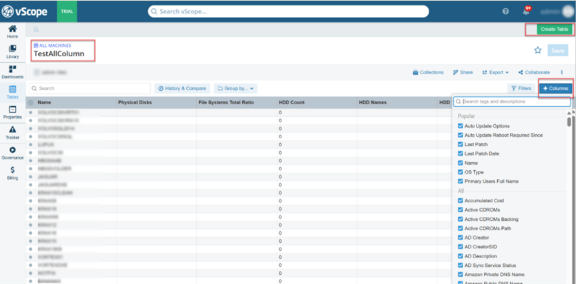
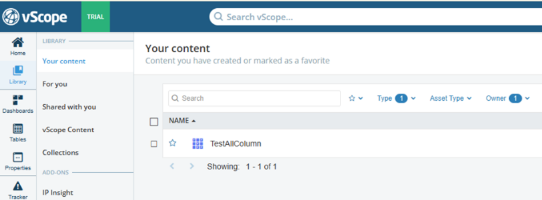
vScope Table view with columns selected and Save Preset option
Configuring vScope Register
Configuration > Channels > Integration Settings > vScope Register
Open NSP Admin Portal. Navigate to Integration settings. Find vScope Register in your integration list. Then, click to Active.
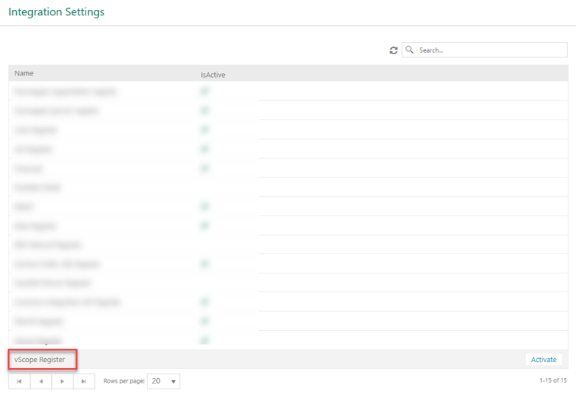
Integration Settings: vScope Register
Click vScope Register to open configuration wizard. Import Now button appears when integration is enabled. Click it to trigger an immediate import.
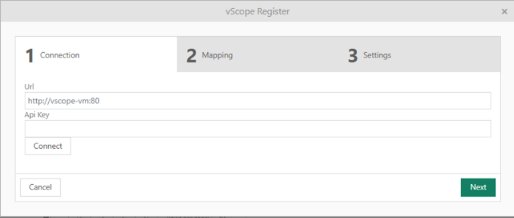
vScope Register Configuration
vScope configuration wizard has 3 steps: Connection, Mapping, and Settings.
1. Connection
Configure connection to your vScope instance.
|
Field |
Required |
Description |
|
URL |
Yes |
Base URL of your vScope instance (e.g., http://vscope-vm:80). |
|
API Key |
Yes |
API token generated from vScope Settings > API (see Section 3). |
|
Table Preset |
Yes |
Select from dropdown after clicking Connect. Preset must include a UUID column. |
Enter your vScope URL and API Key, then click Connect. NSP validates your credentials and loads available table presets from vScope. A success message confirms your connection works.
Select a table preset from dropdown. Dropdown shows preset name and ID. Table type name appears below dropdown. After selecting a preset, available columns display in a scrollable list.
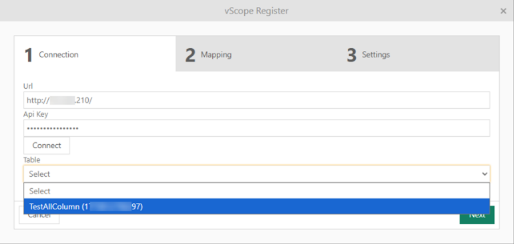
Vscope Register: Connection
Selected preset must include a UUID column. UUID is required for identifying and matching devices during import. If preset does not include UUID, a validation error appears when you click Next.
Click Next to proceed to Mapping step.
2. Mapping
Configure how vScope columns map to NSP CI fields. Each mapping row defines which vScope attribute populates which NSP property during import.
Add Field Mapping (optional)
By default, import matches devices using UUID. When a device record arrives from vScope, NSP looks for an existing CI with a matching UUID. If found, NSP updates that CI. If not found, NSP creates a new CI.
Enable Add field mapping checkbox to add a second matching layer. When enabled, import follows this order:
1. Look for an existing CI by UUID.
2. If there is no match by UUID, look for an existing CI using your selected field pair (e.g., Serial Number).
3. If there is no match by either method, create a new CI.
When to use this feature
This feature is useful when your NSP already contains Computer CIs that were created manually or imported from another source. These existing CIs do not have a UUID because they did not come from vScope.
Without Add field mapping: Import creates duplicate CIs for every device, because UUID matching finds nothing.
With Add field mapping (e.g., Serial Number): Import matches existing CIs by serial number, updates them with vScope data, and assigns a UUID. No duplicates are created.
After first successful import, all matched CIs have a UUID. Subsequent imports find devices by UUID directly. Add field mapping is only needed for initial matching of pre-existing CIs.
|
Field |
Description |
|
Staging field |
Select a vScope column as matching key (source side). Example: Hostname, Serial Number. |
|
CI Property |
Select an NSP CI field or property to match against (target side). Example: ci:name, ciprop:SerialNumber. |
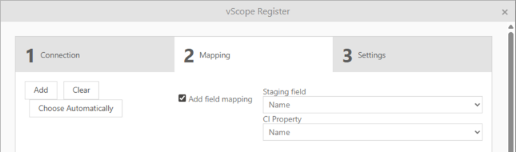
Vscope Register: Mapping
Column Mapping Table
Mapping table has two columns: vScope attribute (source) and NSP attribute (target). Each row maps one vScope column to one NSP CI field or CI property. Remove a row by clicking X button on its right side.
Actions:
•Add mapping: Adds a new empty row.
•Clear: Removes all mappings and resets to a single empty row.
•Choose Automatically: NSP analyzes vScope column names and suggests mappings based on name matching, alias lookup, and singular/plural variations.
NSP attributes in dropdown are grouped into two categories:
•CI Fields: Core Computer CI fields (Name, IP Address, MAC Address, Domain, UUID).
•CI Properties: Custom properties on Computer CI type (Serial Number, Vendor, Model, CPU Speed, RAM, HDD, OS).
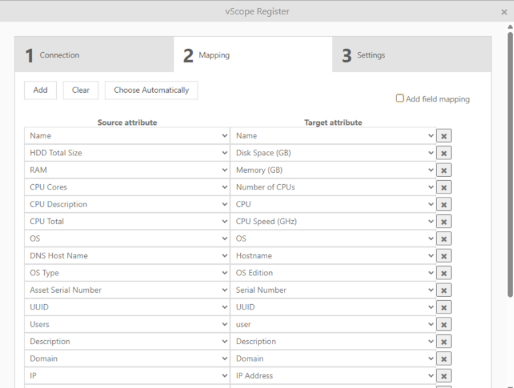
Vscope Register: Mapping
At least one valid mapping is required. Duplicate vScope column mappings are not allowed. Both vScope column and NSP attribute must be selected for a row to count as valid.
Click Next to proceed to Settings step.
3. Settings (Scheduler)
Configure automatic recurring imports.
Scheduler
Enable Scheduler checkbox to set up automatic recurring imports. When enabled, schedule editor appears with these options:
|
Schedule Type |
Description |
|
Generate Once |
Runs import one time at a specified date and time. |
|
Daily |
Runs every N day at a specified time. |
|
Weekly |
Runs on selected days of a given week, every N week. |
|
Monthly |
Runs on a specific day of selected months, every N month. |
For Daily, Weekly, and Monthly schedules, you configure an end condition: no end date, end after N occurrences, or end by a specific date.
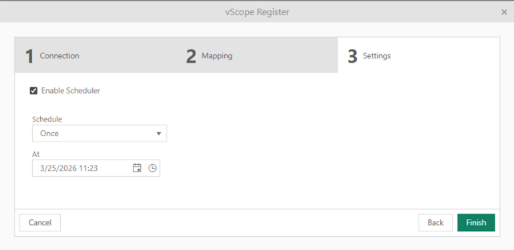
Vscope Register: Settings
Click Finish to validate settings, save all configuration, and close wizard. NSP validates vScope connection one final time before saving.
Running an Import
Click Import Now button next to vScope Register in your integration list. NSP creates an import job that runs immediately. Monitor progress in Status View.

Vscope Register: Import
Scheduled Import
If you have configured a schedule in Step 3, imports run automatically at defined times. Each scheduled run creates a status entry visible in Status grid.
Import Status and Logs
Status Grid
Status grid shows all import jobs (manual and scheduled). Each row represents one import run.
Grid columns:
•ID: Unique job identifier.
•Request Time: When import was requested.
•Status: Current state (Running, Completed, Cancelled, Failed, Skipped).
•Progress: Percentage of records processed. Running jobs show a real-time progress bar.
•Integration Type: Shows vScope.
•Last Run: Timestamp of most recent completed run.
•Next Run: Timestamp of next scheduled run.
•Run Count: Number of completed runs for this job.
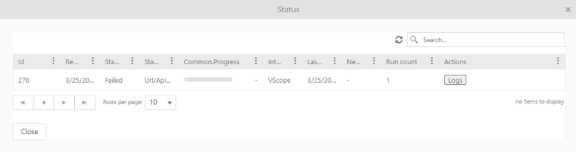
Status grid
You cancel a running job using Cancel button. Grid auto-refreshes every 8 seconds while jobs are running. Use toolbar Refresh button to manually refresh. Use search bar to filter jobs.
Run Log Details
Click View Log on any status row to see detailed statistics for that import run.
Run log shows two rows of information:
Summary Row
•Status: Final status (Completed, Failed, Cancelled).
•Request Time: When import was triggered.
•Processed: Records processed out of total (e.g., 150/150).
•Errors: Records that failed to import.
Statistics Row
•Inserted: New Computer CIs created.
•Updated: Existing Computer CIs updated with new data.
•Deleted: CIs marked as disposed (devices no longer in vScope).
•Skipped: Records skipped (e.g., missing identity value, no changes detected).
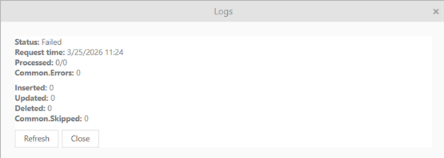
Run log detail view
Click Refresh to update log data. Click Close to return to status grid.
How Import Works
When you run an import (manually or scheduled), NSP connects to vScope and pulls device data into your system. Here is what happens step by step:
1. 1. NSP connects to your vScope instance using your URL and API Key.
2. 2. NSP downloads device data from your selected table preset.
3. 3. NSP reads and processes device records one by one.
4. 4. For each device, NSP checks if it already exists in your system (by UUID or your custom field mapping).
5. 5. If a device exists, NSP updates it with latest data. If not, NSP creates a new Computer CI.
6. 6. NSP fills in all mapped fields: name, IP address, MAC address, serial number, vendor, model, OS, and any other properties you configured.
7. 7. NSP marks all imported devices as In Use.
8. 8. When finished, NSP saves a log with totals: how many devices were added, updated, skipped, or had errors.
You track progress and results in Status grid and Run Log (see Section 7).
Email Notification
When import completes, NSP can send an email notification with a summary report. To enable this, enter one or more email addresses in the Send Logs to Email field in the Settings step of the configuration wizard.
The email includes:
•Import status (Completed, Failed, or Cancelled).
•Summary counts: total processed, inserted, updated, disposed, skipped, and errors.
•A tab-separated report file attached with per-device details: device name, external ID, action taken (Inserted, Updated, Disposed, Skipped, Error), and any relevant messages.
Multiple email addresses are supported. Enter each address and press Enter to add it. If the field is left empty, no email is sent.
Troubleshooting
|
Problem |
Cause |
Solution |
|
Connection fails when clicking Connect |
Wrong URL, invalid API Key, or vScope server unreachable. |
Verify vScope URL is correct and accessible from NSP server. Check API Key is valid in vScope Settings > API. |
|
Selected preset must include UUID column |
Chosen table preset does not have a UUID column. |
Edit table preset in vScope and add UUID column. Or select a different preset that includes UUID. |
|
No automatic mappings generated |
vScope column names do not match any known NSP CI field names. |
Add mappings manually. Verify column names in vScope match expected formats (e.g., IP, MAC, Serial Number, Vendor). |
|
Import runs but no CIs created |
Mappings are incorrect, or CSV data is empty. |
Verify mappings are correct. Check table preset in vScope contains data. Review run log for error details. |
|
Duplicate CIs created after import |
UUID values are empty or inconsistent. |
Ensure UUID column is populated in vScope. Consider enabling custom field mapping for alternative matching. |
|
Import Now button not visible |
Integration is not enabled. |
Open vScope Register wizard and complete all steps to enable integration. |
|
Scheduled imports not running |
Scheduler not enabled or schedule configuration is invalid. |
Open wizard Step 3, verify scheduler is enabled with a valid schedule. |