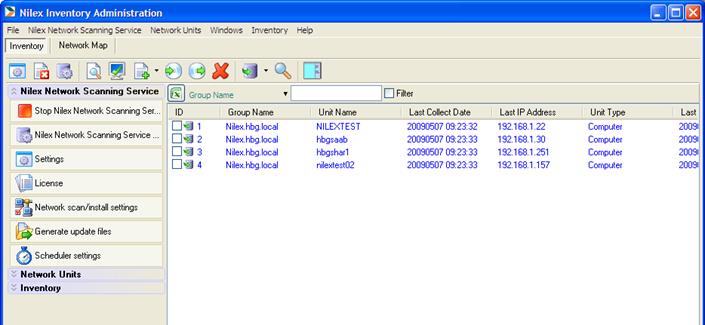
NNS console window consists of a list of units (now empty), a menu, a toolbar and a menu panel to the right. The menu options Nilex Network Scanning Service, Network Units and Inventory are all available in the menu panel for easy access.
Figure 8- NNS console
Above the main unit list there is a exporting to Excel-button and a filtering tool
NNS consoleToolbar

Figure 9- Toolbar
Most of the functions in the toolbar can also be reached from the main menu
Open Connection Settings
Show System Errors
Open NNS Service Settings
Open selected unit
Open a dialog for changing group, name and type for custom unit
Add new unit or scan network for units to add
Reinstall agent on checked units
Uninstall agent on checked units
Delete checked units
Collect data from units
Collect from checked units
Collect from all units
Search in collected data
Switch side for the menu panel
Unit List

Figure 10-Main unit list
In the list the registered network units are shown. The main unit list can be filtered with the function just above the window
The columns contain the following information about the units:
•ID is the database-ID.
•Group Name is the workgroup or domain.
•Unit Name can be a computer or printer name.
•Last Collect Date is the date when unit information was last collected.
•Last IP Address is the latest detected IP address of the unit.
•Unit Type is the type, for example Computer.
•Last available is the latest date the unit was connected.
•Agent version shows if the agent version is old version or current version.
•Internal ID is a uniquely generated ID for the computer & agent.
•Mac address – NIC’s mac address
•STATUS shows if unit is online
It is possible to sort all the columns.