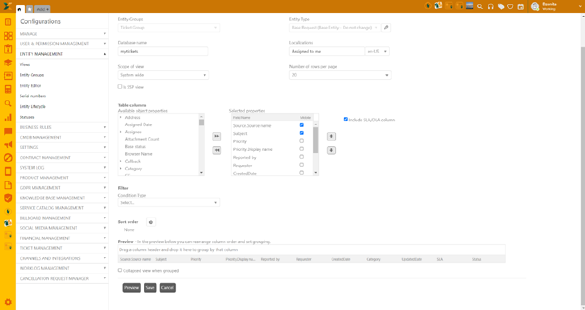
In NSP you can add new views, both own (personal) and common views. Below figure shows View Editor form, used to add a view:
View Editor
To add a view:
Click the Add new record button in Views tab. This action opens the Add View form.
The form contains two dropdown lists to select entity, Entity Groups and Ticket Type, and two textboxes, Strong Name and Localizations.
Select Entity Group from the dropdown list. Ticket Type dropdown will be filtered based on the selected Entity Group.
Select the Ticket Type from the dropdown for which you want to add a new view. As soon as you select Ticket Type, additional fields gets displayed related to the selected Ticket Type. If you want to change Ticket Type, click Edit button beside the Ticket Type field. A popup is displayed asking you to confirm the action. If you select OK then all the settings which has been done for the view is removed and the form will be refreshed with basic fields.
Number of row per page - This is a mandatory setting where you can choose 5, 10, 15, 20, 25, 50, 100, 150 or 200 in the dropdown.
Is SSP view – mark this checkbox if you want to display this view on SSP as well.
Fill out the details presented in the form. The fields are explained in detail in View Editor Fields.
To test the content of the view based on the entered criteria, select Preview button.
Click on Save button to add the view.