This function enables you to create and manage Scheduled Triggers. Scheduled Triggers run every 15 minutes after the ticket is created and they are used to execute actions under certain pre-defined circumstances automatically after some pre-defined time. When the trigger condition is fulfilled and the actions are performed, the trigger is closed. This means that a trigger can only be executed once for the same ticket.
You can create, edit, clone, delete and activate or deactivate Scheduled Triggers.
To access Scheduled Triggers, go to Configurations > Business Rules > Scheduled Triggers.
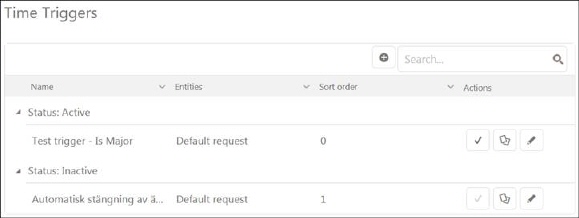
Following figure shows main page of Scheduled Triggers:

Scheduled Triggers
The Scheduled Triggers main page contains a list of triggers. Search box and column menu for sort and filter the list are similar to other lists in NSP, see section General User Interface.
The main component is a list. The list contains Scheduled Triggers created so far. The list displays active triggers followed by inactive ones. Each item in a list contains information Name, Ticket type, Sort Order and Actions buttons.
Actions buttons are:
•Activate to activate or deactivate trigger.
•Clone to clone the trigger and create a new one.
•Edit to edit the trigger information. This selection opens the same form used when adding a new Scheduled Trigger. When Edit the information is already filled in the form.