Tasks tab on Ticket Detail page shows a list of tasks connected to the current ticket. For each task Subject, Id and Status is shown.
Options menu  of each task has options to
View, Edit and
Delete the task.
of each task has options to
View, Edit and
Delete the task.
View option shows a
header containing task Subject and Status. Status is displayed as a dropdown, it is
possible to select a new status for the task here. Header also contains
 menu with options Refresh and Edit.
Below header there are two tabs, Properties and Comments. In Properties tab you can read task basic properties. Comment tab shows all existing comments and function to add new comment. Task comments works similar to ticket comments, see above.
Edit option opens same form as used to Add Task, see below.
Button  opens form for adding new
task.
opens form for adding new
task.
First step is to select if you should add a single task (Add Task) or use a Task Template to add a set of pre-defined tasks.
If you choose Add
Task a form is opened where you enter task data. Tap each row in
the form to open the particular field for input. Input field can have
different behavior due to type of field, e.g. select from a list of users,
priorities or categories, checkbox, input a number, input text, a text
value, etc. Mandatory fields is marked with a star (*).Tap check link  in upper right corner to create
the task.
in upper right corner to create
the task.
If you choose Task Template you get a list where you shall select one of the available templates.
In next step you get at the top input fields for Assignee, Approver and Start Date.
You can select Assignee (User or Group). If you enable checkbox Assign for all the selected assignee will be set to all including tasks.
When you define Start Date will Due Date be calculated for each included task due to settings in the template.
Below the top section there is a list of all including tasks where you can change/define Assignee and Due Date for each task individually.
Tap check link in upper right corner to create
the tasks.
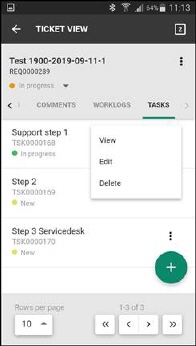
Ticket details page - Tasks Tab
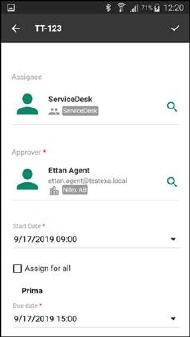
Add Tasks from Task Template