Short description of how to configure “NSP Azure AD sync”
Important: .NET 6 must be installed.
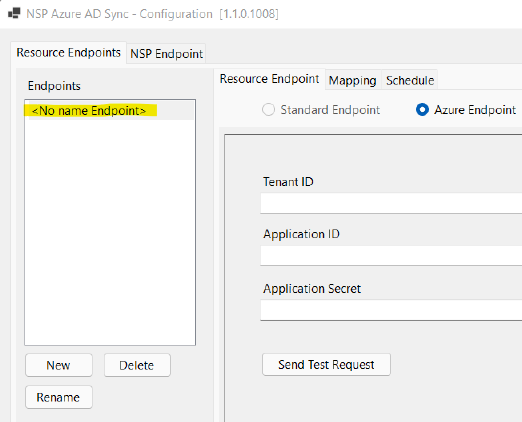
The Settings app
1. Start AzureAdSyncConfig.exein folder “Settings App”
An empty API setting is created:
2. If you wish, change the name.
On tab “Resource Endpoint”, enter your credentials
for Azure, and click “Send Test Request” to verify the setting: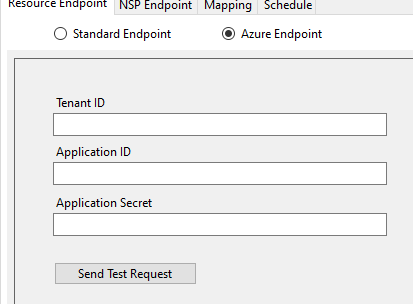
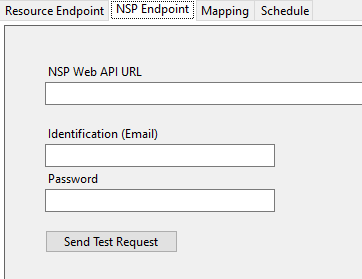
3. On tab “NSP Endpoint” the NSP Web API endpoint and the user credentials to obtain a bearer token. Click “Send Test Request” to verify the settings:
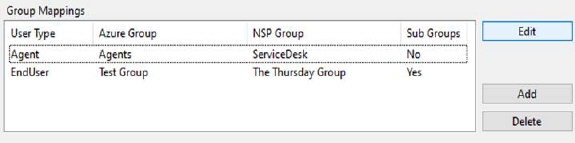
Click tab “Mapping”. Map Azure group with NSP groups, and select user type and whether Azure sub groups should be included in the import.
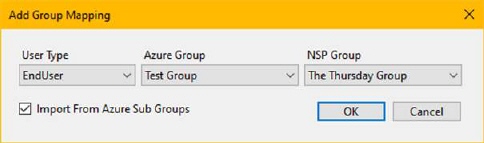
Example of mapped groups:
Map Azure user user fields with NSP user fields.
Field Email is mandatory and is the key field if no other field is set as the
key field. The star (*) in the column “Key” indicates which field is set as the
key field.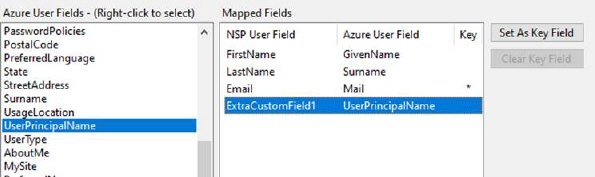
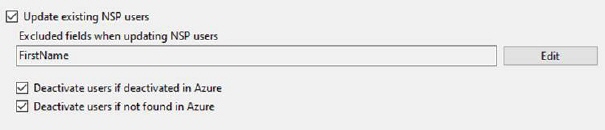
Check the appropriate boxes to enable updating NSP users and to deactivate them when deactivated in Azure or not found in the mapped Azure group. It is also possible to exclude fields from being updated.
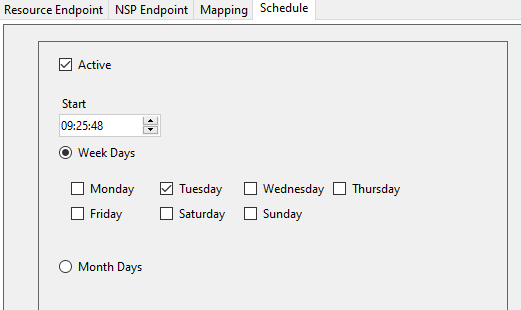
Click tab “Schedule” and click “Active”. Select start-time and week days for the user import to NSP:
4. Click button “Save and close” in the lower right-hand corner to finish the configuration. The file “settings.json” will be created.
Important! If any changes are made to the settings, the worker service (see below) has to be restarted.
The Worker Service
In the folder “Worker Service” register AzureAdSyncService.exe as a Windows Service, e.g. by using sc in command console cmd.
In file “appsettings.json” change the value of key “SettingsPath” to the file “settings.json” which was created by the settings app in the previous section, e.g. "SettingsPath": "C:\\Temp\\Import Users To NSP - BETA\\Settings App\\settings.json". Mind the double back-slashes (\\).
Start the service. A logfile, “Logfile.txt” will be
maintained in the folder “Settings App”.