
Click on any ticket in the list to see its details page. Ticket Form is a detail view of ticket and contain ticket description, default properties and ticket comments.
The Ticket form consists of three main areas:
•Ticket Form Header: Show Ticket Name,
•Left panel: Show ticket description, linked CIs, linked worklogs, tickets comments and comment form.
•Right panel: Show general ticket information, common for all ticket types.
Ticket detail view
All the important points in the ticket detail page are labeled in the figure above and are explained in the same sequence in the below text:
1. The
field shows the Subject of the ticket. Click the
arrow symbol  in front of
the Subject to close the form and return to the list.
in front of
the Subject to close the form and return to the list.
2. Displays the Description of the ticket.
3. Show comment form. When this tab is selected rest of form shows existing comments and field for new comment as described below.
4. CIs. If you select this tab a list of CIs linked to the ticket is displayed. You can open CI Form by click a row in the list. To attach a CI to the ticket click Link CI button. The opened popup form contains CIs where you are Managed by or Used by user. If you have Power User permissions, than all CIs connected to the organization will be available, CIs which are Used by or Managed by any person in organization or CIs are owned by the organization. If you have got extra permissions also other organization´s CIs could be available.
5. Worklogs contain descriptions of agent´s work on the ticket, eg spent time and additional costs. If you select this tab a list of existing worklogs linked to the ticket is displayed. For each worklog you can view details by clicking View rightmost on row.
6. Text field for new comment. There is a textbox provided to add a comment for a ticket. The formatting panel includes common text formatting options; Bold, Italic, Underline, Strikethrough, Unordered list, Ordered list, Insert hyperlink and dropdown menu for font and text size. Preview button is provided in the panel used to preview the comment text. You can add attachments to the comment (6). After adding comment click SAVE COMMENT button.
7. Expand all/Collapse all - Links to Expand/Collapse the comments.
8. Fields to add files as attachments to the comment.
9. Number of existing comments.
10. Search box to search comments. Enter a search keyword and press Enter or click the search icon in the box. The list of comments will be filtered, displaying only comments containing the keyword.
11. This section shows the list of comments made to the ticket. Each item in the list includes: profile image of the user, source icon, an option to collapse/expand the item, name of the user who posted the comment, comment text, like button, and date and time the comment was posted.
12. This section shows the list of ticket general information common for all ticket types. Section can include: Status, Priority, Assignee (optional), Ticket Id, Request date, Ticket type, On behalf of (checked if ticket is created by power user) and Requester.
13. Close Ticket. Use this button to close the ticket. Button will open a popup where you are forced to add a comment. When you save the comment the ticket will be closed and moved to My closed tickets list. In the popup you can also give feedback to the Agent by clicking one of the feedback symbols:
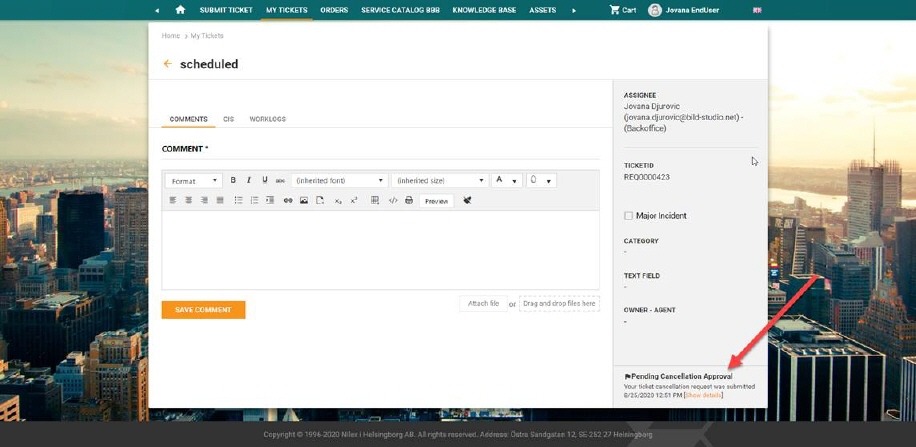
14. Request ticket cancellation – End user can request cancellation of the ticket through the Self Service Portal. In the bottom of the right panel you can click on Request Ticket Cancellation link. By clicking on this button, you need to first select the reason for cancellation and after that, you will get a form to fill the fields for selected type. After filling request, click SUBMIT button to confirm and new cancellation request will be created for the selected ticket. If the cancellation of the selected ticket is already initiated, Ticket View will display current status of the cancellation request in the bottom of the right panel like in picture below:
Status of the cancellation request in the Ticket View
Request ticket cancellation button in Ticket detail view in SSP will be visible only if Cancellation Request is activated for concrete type of ticket (activated by Administrator in Settings). Otherwise, end user will only have option Close Ticket in the Ticket View. If Cancellation Request is activated for that type of ticket, then end user has possibility to ask for ticket cancellation, but the option Close ticket will disappear in this case.