Add/Edit Customer Account
Set-up of the Customer
Account is done in three steps. Select Charging  in agent left menu. Click Customer Accounts in top menu to show a list of existing
accounts. Here click button Add account. First
step is a popup where you shall select a Customer Account
Type. The type decides which properties can be set for the account. All
accounts have the set of basic properties described below, but customer defined
properties could have been added.
in agent left menu. Click Customer Accounts in top menu to show a list of existing
accounts. Here click button Add account. First
step is a popup where you shall select a Customer Account
Type. The type decides which properties can be set for the account. All
accounts have the set of basic properties described below, but customer defined
properties could have been added.
The same forms are used to edit an already existing
account (except the selection of account type), then select Edit link rightmost on row for the account.
Form consists of three tabs, Properties, Charging Plans
and Members. You can step between tabs with
buttons Next or Back. When set up is finished for all tabs, click Save to return to Customer
Account list.
Tab Properties
In first tab, Properties,
you enter Name and Description (translatable texts) and a set of basic
properties:
• Display Name on SSP: Mandatory field. When ordering from
service catalog Requester has to select which
account shall be charged (if requester is member of more than one Customer Account, if not the account is pre-selected).
Here you define which name shall be used for the account on Self Service Portal. This name can be the different from
name used in Agent Portal.
• Customer: Mandatory field. Auto-complete field or select
icon to open list of available Customers. Note that if this field is changed for an
existing Customer Account (the account is
connected to other Customer) can list of members
in the accounts be affected, due to a user can be member of multiple customer
accounts only if the accounts belongs to the same Customer. A single user cannot be member of different
accounts that belong to different customers.
•
Customer Account Type
• VAT applicable: Enable checkbox if VAT shall be added in
invoices created for this account. For work charging is default VAT (VATs) added, for service items there
could be different VAT due to which service item have been ordered. For
Additional charges and Spare parts you can select VAT when adding cost in a
worklog.
• VAT Number: Your company´s VAT number. This number is
shown on invoice.
• Currency Code: Mandatory field. Select currency for the
account. All charging is done in system default currency. If another currency is
selected here the total sum of invoice will be converted to this currency.
• Language: Mandatory field. Select language to be used in
invoices created from this account.
• Work charging: Enable this checkbox if charging for work
via worklogs shall be allowed for this account. If enabled you have to select a
Charging Plan for work charging in next tab.
• Leasing Charging: Enable this checkbox if charging for
leasing of products shall be allowed for this account. If enabled you have to
select a Charging Plan for leasing in next
tab.
• Service Catalog charging: Enable this checkbox if
charging for orders from Service Catalog shall be allowed from this account. If
enabled you have to select a Charging Plan for
service item charging in next tab.
Note: At least
one of the checkboxes Work Charging , Leasing Charging and Service
Catalog charging must be enabled.
• Address: Customer´s address. Click Add to open popup where you enter address properties. It
is possible to add multiple addresses, in popup there is a checkbox for default
address, this will be shown on the invoices.
• Email: Customer´s email. It is possible to add multiple
email addresses, in popup there is a checkbox for default address. The email
address is not used in this version.
Tab Charging
Plans
In this tab you select which Charging Plan to use for charging customers that belongs
to the Customer Account. You can select Charging Plan for Work
,Leasing and/or Service
Catalog charging due to which of them were enabled in first tab. It is
mandatory to choose a Charging Plan for each
enabled type.
Click Add charging plan,
select a plan in popup for the charging types respective. When a plan is
selected the Add charging plan is disabled.
If you already have selected a plan or have opened the
plan in Edit mode you can change Charging Plan to use. Click link Change current rightmost on row.
Tab Members
Select members of the Customer
Account. A member of a customer account can be any item from the offered
list of scopes. (for example - scope Support is a member of the Nilex customer
account, and therefore all users who are members of the scope Support are
indirectly members of the Nilex customer account as well). Same user can be
member of multiple accounts.
When an Agent adds a
worklog to a ticket the ticket Requester
membership specifies which Customer Account can be
charged. If the Requester is member of multiple
accounts must Agent choose which account shall be
charged.
Adding/removing user as a member of customer account can
be done as described in the section Scope Management.
In form there are functions for sort, filter, search,
refresh and paging similar to other NSP functions, see General User Interface.
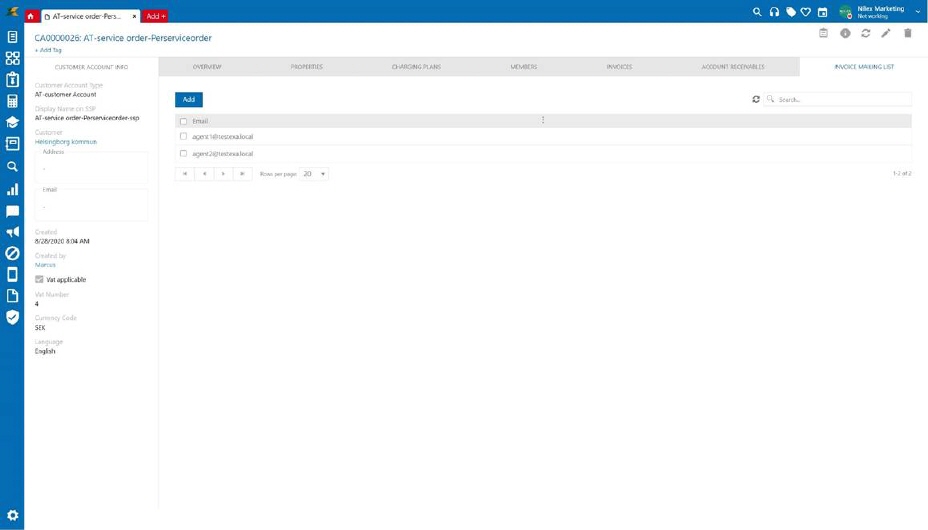
Tab Members in customer accounts
Invoice mailing
list

Invoice mailing list
This feature enables automatically sending all invoices
generated for a specific customer account where you choose the email addresses
to which invoices will be sent. A new email will be added by clicking on button
Add. Each of the entered email addresses in this list can also be deleted
by clicking on the button Remove in the right part of the line. It is
possible to define an email list for receiving invoices for each customer
account. Invoices are sent as an email attachment in PDF format. To make this
function work, you need to set an invoice template in the configuration.
Read
more about creating invoice templates.
Tab addresses
Clicking on the tab addresses opens a list with all the
addresses of the selected customer account.
Addresses tab
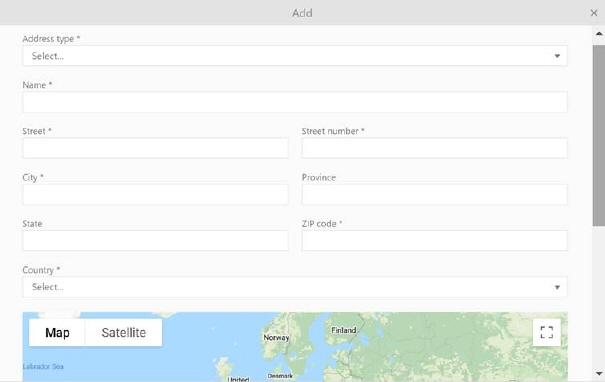
You can add an address by clicking on the Add
address button, which opens a pop-up with the possibility of selecting the
type of address (invoice address, delivery address, correspondent, office or
home), as well as fields for entering address details.

Add address popup
A customer account can have an unlimited number of
addresses entered, but only one default address for each type of address.