Getting Started with NSP
The objective of this section is to be a guide for start
using NSP (Nilex Service Platform).
When the system is installed you need to go through a
number of steps to prepare the system for use in live production. You should
adjust it to your company, to your business and the needs and requirements of
your service delivery. This section describes those steps.
This is an advisory guide, the document should be used
as a checklist. Which steps you have to carry out could vary due to your
company´s business structure, service requirements or NSP configuration.
Installation
The NSP application could be installed in two different
ways:
• On Premise. NSP is
installed on an in-house server.
• Cloud. NSP is
installed on a foreign server and you reach the application via internet.
In both cases you need to know the URL to start the
application. You need an administrator login (Email
Address=Username and Password) to enter the system first time. This first
user is defined during installation. If you haven´t done the installation
yourself (Cloud installation) you maybe have got the URL and login information
in an email.
If you forgot this Admin username and/or password for
your installed application then you need to uninstall and reinstall the NSP
application.
Login
Upon ordering the online solution of NSP, you were
supplied with an Account ID, Username, Password, and login URL. Use the details
to login to the system. A unique domain will be provided for each request. No
account has access to any other account.
If the application is installed on your System you need
to install web server and create URL. Default port after installation is
1800.
You might have received username and password in two
ways:
1. You
created username and password during installation setup. In this case, you can
login in to the installed NSP application.
2. You
have received username and password by an email from NSP. In this case, you can
only login in to online version of NSP.
For login to NSP application, perform following
steps:
Open any web browser and input URL to NSP application.
If the application is an on premise installation, then shortcut for the
application has maybe already been created and you just need to click the
shortcut to open the application.
NSP Start page
Use the login details to login to NSP (Email Address and Password) created when application was installed.
Clicking an Information
button, , anywhere in the system opens a
popup containing information help text regarding the current displayed function
or page. In the popup you can find a Read more…
link. This link will open User Manual page for the
current function.
, anywhere in the system opens a
popup containing information help text regarding the current displayed function
or page. In the popup you can find a Read more…
link. This link will open User Manual page for the
current function.
|
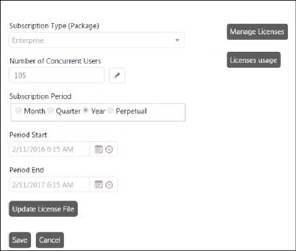
Normally NSP License
is already active when you log in first time. If there is no valid license
activated when you have logged in you will be redirected to the
License/Subscription page:
Here you can activate the License you got from the
provider.
Read more: License and Subscription.
|
License/Subscription |
Google API
Map view uses Google Maps, a web mapping service
developed by Google. It offers satellite imagery, street maps, 360° panoramic
views of streets. To use Google Maps in NSP you have to receive an API key from
Google for the application. The use is free of charge for up to 2500 map queries
per day.
Read more how to get an API key and enter it to NSP
Database:
Google
Maps API Key
Company
Information
After successful login, the next step is to configure
Company Information. To access this page:
Click Configuration icon
 > Click Account Management in Settings menu > Select Company
Information tab:
> Click Account Management in Settings menu > Select Company
Information tab:

Company Information
Read more: Company
Information.
Branding
In this step you can customize the NSP application by
selecting favicon and color theme associated to your company profile.
Click Configuration icon
> Click Account Management in Settings menu > Select Branding tab:
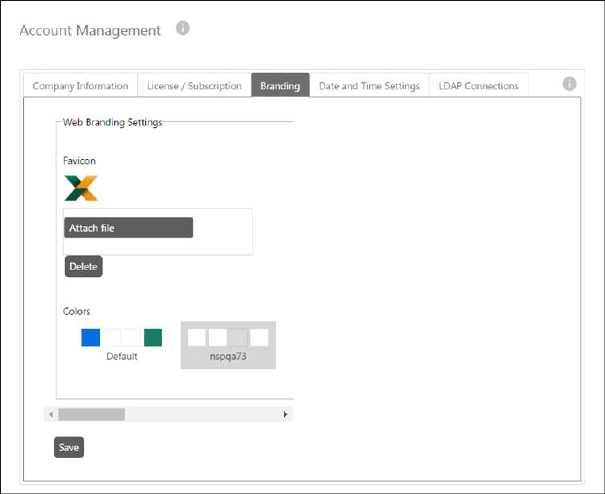
Configure Branding
Read more:
Branding.
The Theme Builder allows you to create and manage
different themes for NSP. You can use it to customize the look and feel of
NSP:
Theme
Builder.
Time Settings
In this step you select default Time Format. This is default settings, they can later be
overridden by Agents individually by doing own
settings in their User Profile.
Date Format is always
controlled by selected language, and default value could not be defined.
Click Configuration icon
> Click Account Management in Settings menu > Select Time
Settings tab:
Read more:
Date and Time
Settings.
The next step in the process is language configuration.
NSP Standard Language was defined during
installation of the application. All Language
Management starts from this language. In Language
Management you define which other languages should be available for use
in the system and you select default languages for Agent
Portal and Self Service Portal. In
Translation Management you handle translations of texts to different languages
and export/import of language text files.
Click Configuration icon
> Click Language & Translation in
Manage menu.
Functions available are described here:
Language &
Translation.
If you have received language files (xml format) for
your language(s) delivered separately, you should import these. You find
description of the import function here:
Import/Export Language files.
Email Configuration
Email Accounts can be
setup as support channels in NSP. You can set up the email account using
different email service providers supported by NSP like Microsoft Exchange,
Microsoft Office 365, Gmail, Yahoo or Custom (POP or IMAP).
Normally you need to configure at least one Email Account in NSP. Emails sent to NSP become tickets
or comments in existing tickets and Email Notifications sent from the system uses the account
marked as default.
Click Configuration icon
 > Click Email Configurations in
Channels menu.
> Click Email Configurations in
Channels menu.
Details about how to setup Email Accounts in NSP you will find
here:
Email
Configurations.
Email Rules
To hinder spam mails creating tickets we recommend
creating E-mail rules. You can apply one or more rules describing how to handle
emails received in the configured Email Account. You find details how to apply
Email Rules here:
Email
Rules.
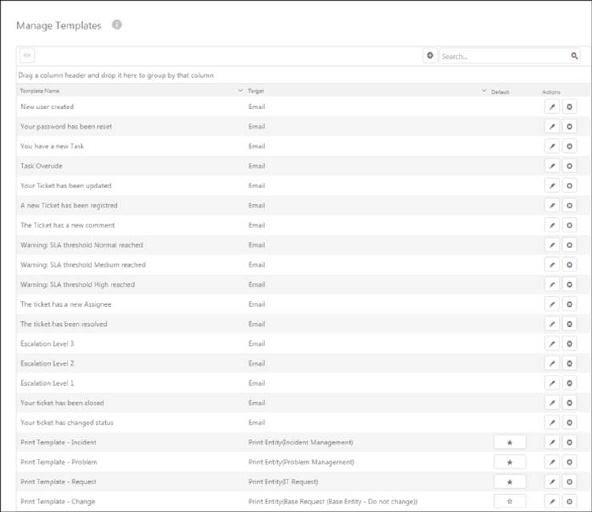
Text Templates
The next step in the process is to modify and create
Text Templates. Text
Templates are used to format the text in Notifications, Comment or
Prints. Using templates, you can generate the
format once and can use it several times. Using templates also secure that e g
notifications or comments always have correct and uniform format.
Click Configuration icon
> Click Text Templates in Manage
menu.
The figure below shows a lists of standard Text Templates that are already created, and included in
a basic NSP system.
If you intend to use those standard templates you have
to modify them to adjust the texts to your company profile. You also should
inactivate templates that you not plan to use.
If you are using NSP in other languages, you have to
translate the standard templates you intend to use. Name of the template, Subject of the email and the Text
Body can be saved in different languages.

Standard Text Templates
The User Manual describes all details about create and
modify Text Templates. You find this description
here:
Text
Templates.
Notifications
You can create Notifications for notifying users in various events.
Using Notifications, users get informed for each
event that involves them. Different types of Notifications can be created:
• Notifications for Tickets and Tasks.
• Notifications for CI, Contracts and KB.
Click Configuration icon
> Click Notifications in Manage
menu.
The figure below shows a lists of standard Notifications (Notifications for
Tickets and Tasks) that are already created, and included in a basic NSP
system.
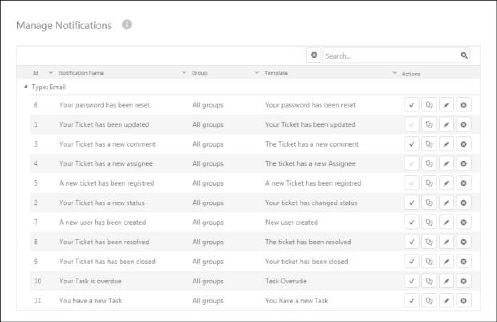
Standard Notifications
Notification management (Add/Edit) is described
here:
Notifications.
Notification are using Text Templates. Read about Text
Templates here:
Text
Templates.
People
People interface in NSP
handles manage of users and how to group the users in order to allocate each
user adequate privileges in the system.
The People interface
consists of a number of tabs:
• End Users
• Agents
• Groups
• Organizations
• Roles
• User Types
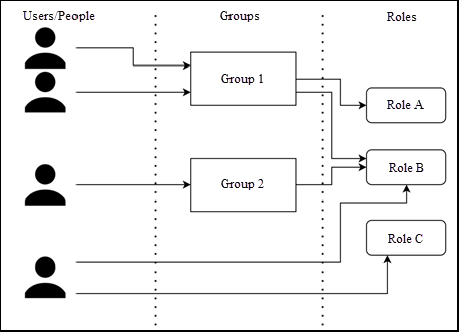
Users, Groups and Roles
To a Role you define
access and permissions to different parts and functions in NSP. The Role is most often a definition of a work unit in the
company, e g “2ndline IT Service”.
A Group is an
administrative unit in the company, e g “Servicedesk”. The permissions for a
Group member is defined by which Roles are assigned to the Group.
Users are named persons
having access to NSP. Users are divided into Agents and End Users. Each
User could be a member of an Organization.
Roles are assigned to
Groups and/or Users.
The permissions for a certain User is defined by
the merge of all roles the User is assigned to,
either via Groups or direct to Roles.
Groups
The next step is to add Groups. Groups are used to
manage privileges in NSP users and to handle the ticket workflow.
Groups can contain Agents and End Users.
Agents must be assigned to at least one group but
they can be members of more than one. There are some common ways where groups
are used:
• To support service
level agreements, SLA.
• To provide support
by expertise.
• To support
customers by location and/or language.
• To escalate
incidents based on their complexities.
A basic NSP system is prepared with a number of
pre-defined Groups.
Click Configuration icon
> Click People in Manage menu >
Select tab Groups.
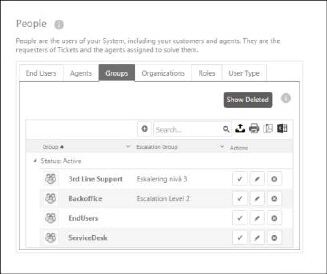
Standard Groups
Read more:
Groups
Roles
In this step you add Roles
and define permissions and privileges for each Role. A basic NSP system is prepared with a number of
pre-defined Roles. You can choose to use and
adjust them to your need, or you can create new Roles and allocate adequate permissions to them.
Click Configuration icon
> Click People in Manage menu >
Select tab Roles.
The figure shows a list of the pre-defined Roles:
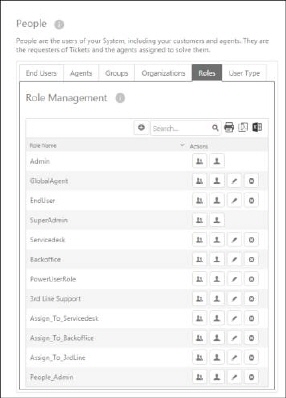
Standard Roles
Read more of how to create and manage Roles and assign permissions to Roles:
Roles and
Permissions.
Users
There are two types of the users in
NSP:
• Agents are
the people, who resolve support requests. Agents
have different privileges in the system defined by Groups and Roles.
• End Users
are also referred to as customers. They are the people who generate the support
requests from any of the support channels available in the NSP.
There is three ways to add Users:
• Automatically
using AD, see LDAP Connections.
• Manually through
NSP People interface
• Manually by
letting each user creating End User account on the Self Service Portal and then
as Admin manipulating these on the People interface. The End User accounts can, if so needed
be changed to Agent accounts.
Click Configuration icon
 > Click People in Manage menu >
Select tab Agents and End
Users respectively.
> Click People in Manage menu >
Select tab Agents and End
Users respectively.
Description of how to manage users:
End Users
(Customers).
Agents
Configure LDAP
Servers
You can configure LDAP server to allow single sign-on to NSP users
from your company’s Active directory. Using this server, NSP can also fetch and
sync the user details from Active directory.
Click Configuration icon
> Click Account Management in Settings menu > Select LDAP
Connections tab.
Read more:
LDAP
Connections.
Agent Portal
Configuration
We recommend that you customize the configurations for
Agent Portal of NSP account. When an Agent logs in to the system, these default settings will
be used. The Agent can later individually override
some of these settings in the User Profile.
Click Configuration icon
> Click Configurations in Settings
menu > Select Agent Portal Configuration.
Clicking this tab opens Agent Portal Configuration,
containing settings for e g Timer, Knowledge base search, Tabs, Comment and Map.
All of these settings are described in:
Agent Portal
Configuration.
You do configurations for Login page and Self Service
Portal of NSP account in this step.
Click Configuration icon
> Click Configurations in Settings
menu > Select Login Configurations.
Click Configuration icon
> Click Configurations in Settings
menu > Select SSP Configurations.
Read more about Login Configuration:
Login
configuration.
Read more about SSP Configuration:
SSP
configuration.